Configuring Customer Managed Secure Print
Go to Configuration > Secure Print.
Select Customer Managed Secure Print.
Select Enable.
Enter the information as needed:
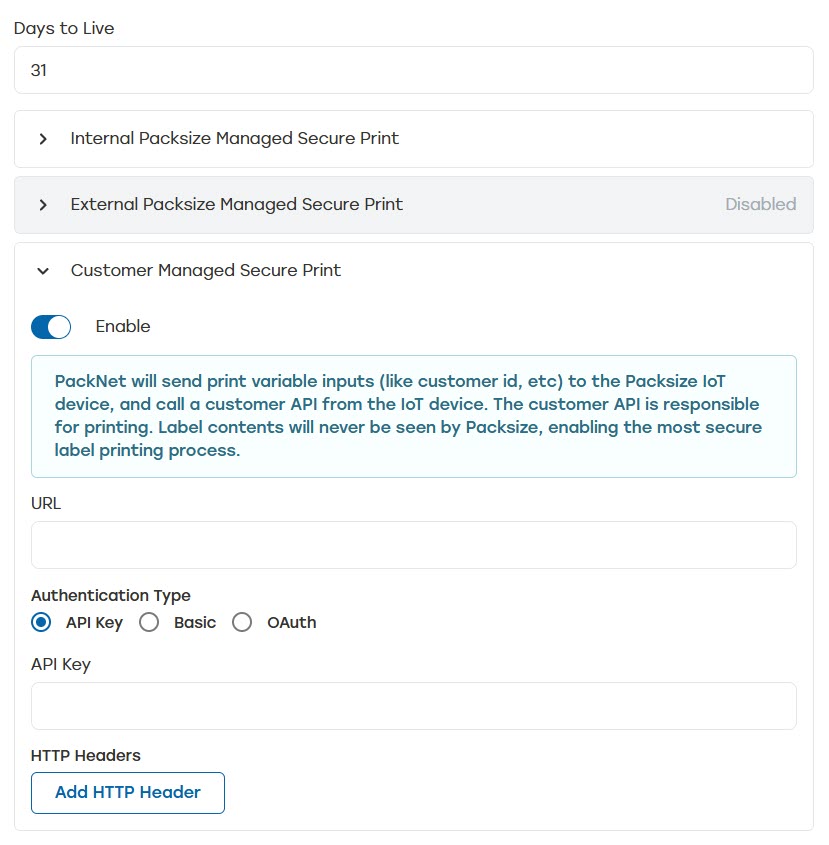
URL: Specify the external customer URL for the API call.
Authentication Type: Select how the data will be authenticated.
API Key: X-API-Key token
Basic: Base64 encoded [username]:[password]
OAuth: This will always be a bearer token that is set with the short-lived token that can be validated against the OAuth identity server
HTTP Headers: Enter Name and Value. These are optional static header names and values that will be included in the API request from PackNet to the customer. HTTP Headers are different from the headers created in Mapping.
Go to Configuration > Import Pipeline.
Create a rule and select one of the following rule actions:
Add Label to Carton
Add Standalone Label
Add Carton, and then select +Label
From the Label Template dropdown, select Customer Managed Secure Print.
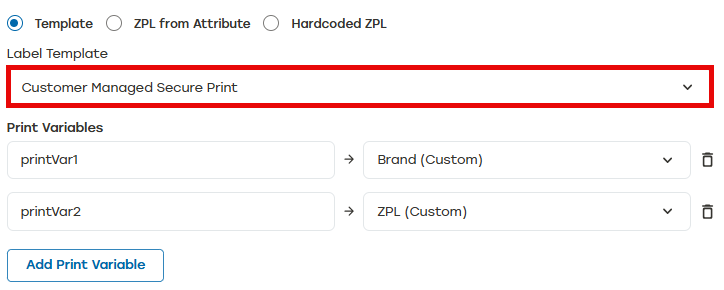
Select Print Variables. These variables are sent in API requests. Each variable will be added to the inputs field of the request payload.
Select Save.
Customer Managed Secure Print API Call
The request payload is sent from Packsize to the customer. The response is the expected customer response assuming the API call was successful.
HTTP Method: [POST]
Request Payload:
{
  "inputs": {
    "printVar1": "value1",
    "printVar2": "value2",
    "printVar3": "value3"
  },
  "printerIp": "127.0.0.1",
  "printerPort": 9100
}Status Code: 200
Response Payload: Empty Body
Additional Information
When needed for troubleshooting, check Search Details for additional job information. See Search for more information.