Disto
The Disto page provides users with everything they need to customize a job while using a DISTO device without ever leaving the Disto page. The Disto page comes ready to use with no configurations necessary. The original Disto Input page is still available within the Scan to Produce page.
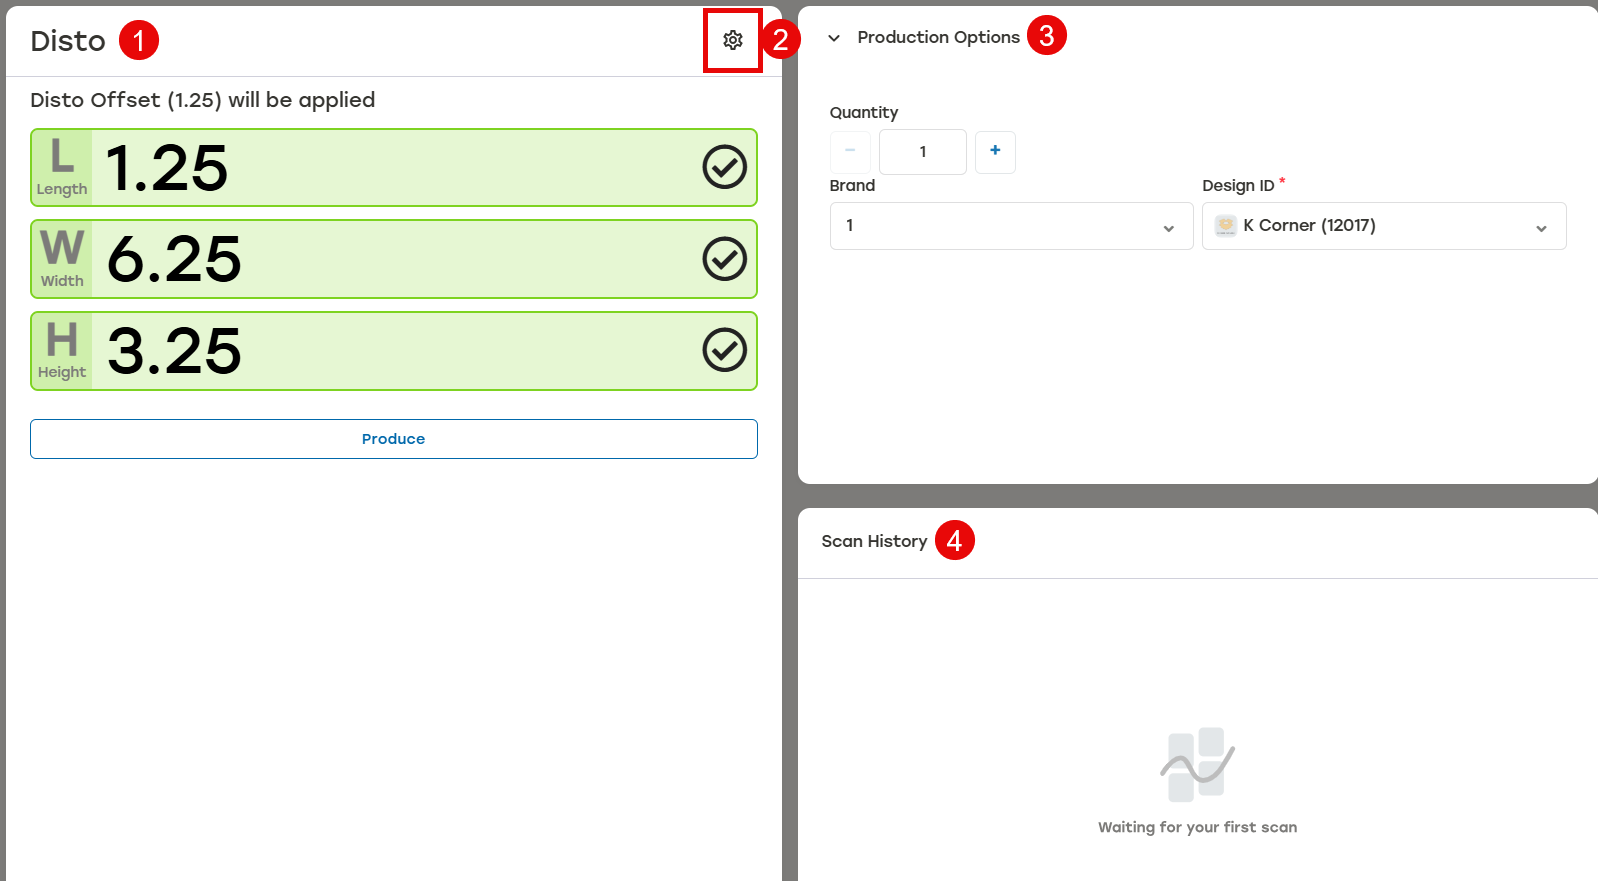 |
The Disto section displays the scanned dimensions along with the current Disto Offset at the top. A scan from the DISTO device will be sent to DIM with the offset value applied automatically. This causes the scanned value on the device and what is displayed in DIM to differ unless an offset value of zero has been set. When the offset value would make the dimension a negative number, the dimension will default to zero.
Disto settings allows the user to change Disto settings without leaving the Disto page by selecting the gear icon. Certain settings can also be changed on the Settings tab. See Disto Settings for more information.
Production Options allows users to easily change certain settings to adjust the solution that will be sent to PackNet for production. Options to change the quantity of cartons being produced, packaging design, or the brand of the corrugated are available here. When these options have been set and are not needing to be changed frequently, the menu can be hidden from view with the dropdown arrow to allow an expanded Scan History section. When enabled, users can select which Packstation the job is sent to.
Scan History displays completed scans. Users can reproduce completed scans directly from this section. Changes can be made to the scan history in 10 mm or 0.25 in. before it's sent to production. Reproduce options can be accessed by selecting the menu to the right of the completed job.
Disto Settings
Disto settings can be changed directly from the Disto Settings dialog. Disto Settings is accessed by selecting the gear icon at the top of the Disto section.
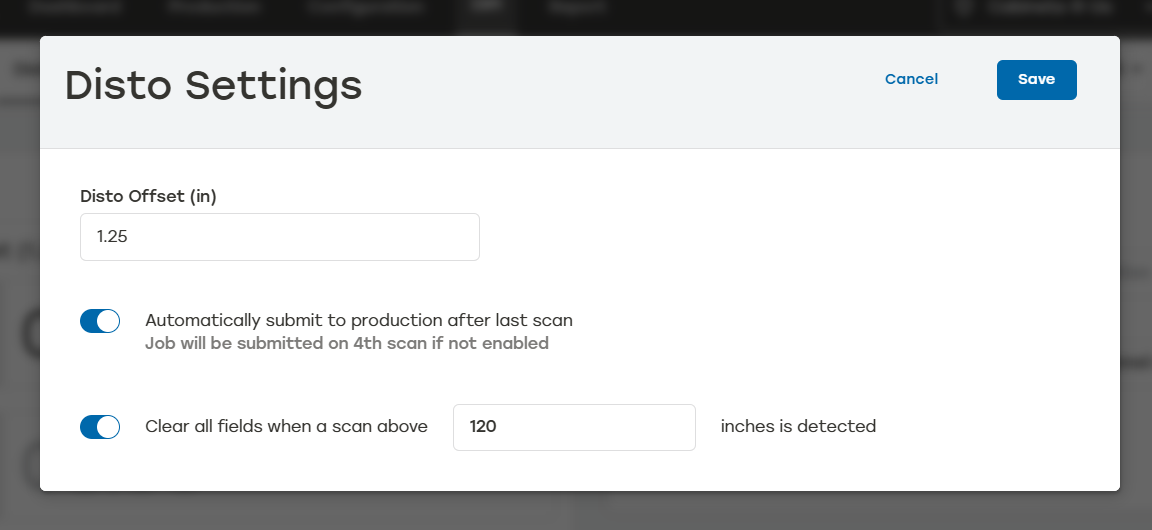 |
Disto Offset: This number establishes the offset value when a DISTO device with a bracket is used allowing users to update the dimensions regardless of what bracket device is being used. This is the same number as what is set on the Settings tab. Changing the number on either page will update the Disto Offset globally.
Automatically submit to production after last scan: When this option is selected, the dimensions will automatically be sent to production after the third scan. Without this option, dimensions won't be sent to production unless a fourth scan is produced or the Produce button is selected.
Clear all fields when a scan above [#] is detected: This field prevents scans that are too large from unintentionally being sent to production. When a scan larger than the entered number is detected, the Disto page will clear all fields allowing users to restart the scanning process without having to engage with the Operator Panel.