Machine Groups
Machine groups are used to create logical groupings in PackNet based on physical groupings. Machines in machine groups synchronize and work together as a unit. Each machine can only belong to one machine group.
When a machine group contains two machines—one online and one offline—then the machine group will be offline. To enable the machine group to receive jobs, the machine group must be in the production enabled state. The machines in the machine group must be online and not paused to make them production enabled.
Important
The X7 is a fully automated machine that includes the ability to transport, pack, glue, and label the order. Each X7 is considered an individual machine group.
Add a Machine Group
On the Machine Groups page, select Add New.
Enter the details for the new machine group.
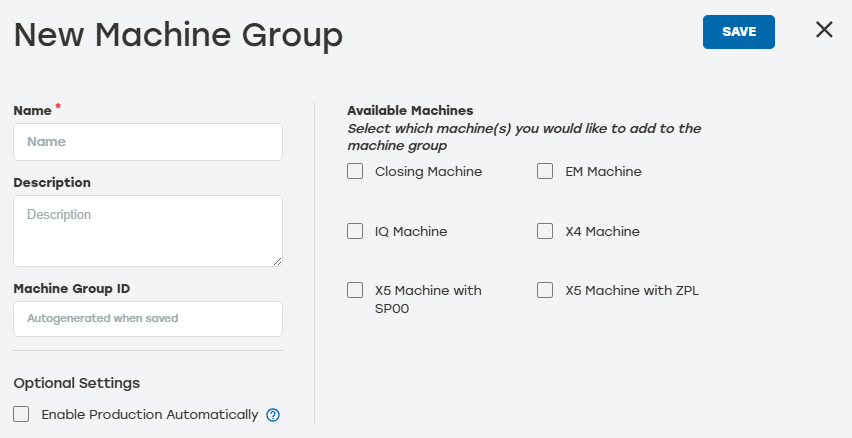
Name: This should be something that clearly identifies which Machine Group this is (i.e., EM7-Group)
Description: This is not required but is helpful when users have more than one machine group in their system
Optional Settings: Select Enable Production Automatically to automatically put the machine group in Play mode when it comes online
Available Machines: Select which machine will be added to the machine group
Select Save.
Make sure the new machine group now appears on the Machine Group page.
Machine Groups History
Go to the Machine Groups page.
Select the history icon
 to the right of the desired machine group to review the data.
Date: The date the entry happened
Type: The type of item listed in the entry
Activity: A brief description of the action
User: The PackNet user who completed the action
Select the arrow icon
 for a detailed view of the activity.
Select anywhere outside the Machine Group History dialog to return to the Machine Groups screen.
Edit Machine Groups
Go to the Machine Groups page.
Select the edit icon
 to the right of the machine group that needs to be edited.
Make changes as needed. The selection options will change depending on the machine type.
Select Save.
Delete Machine Groups
Go to the Machine Groups page.
Select the delete icon
 to the right of the machine group that needs to be deleted.
A dialog will appear asking to confirm deletion. Select Yes.
Make sure that the deleted machine group no longer appears on the machine group page.