Label Templates
Note
Label templates are not utilized for the X7.
On the Label Template page, select Add New.
Enter the details for the new label.
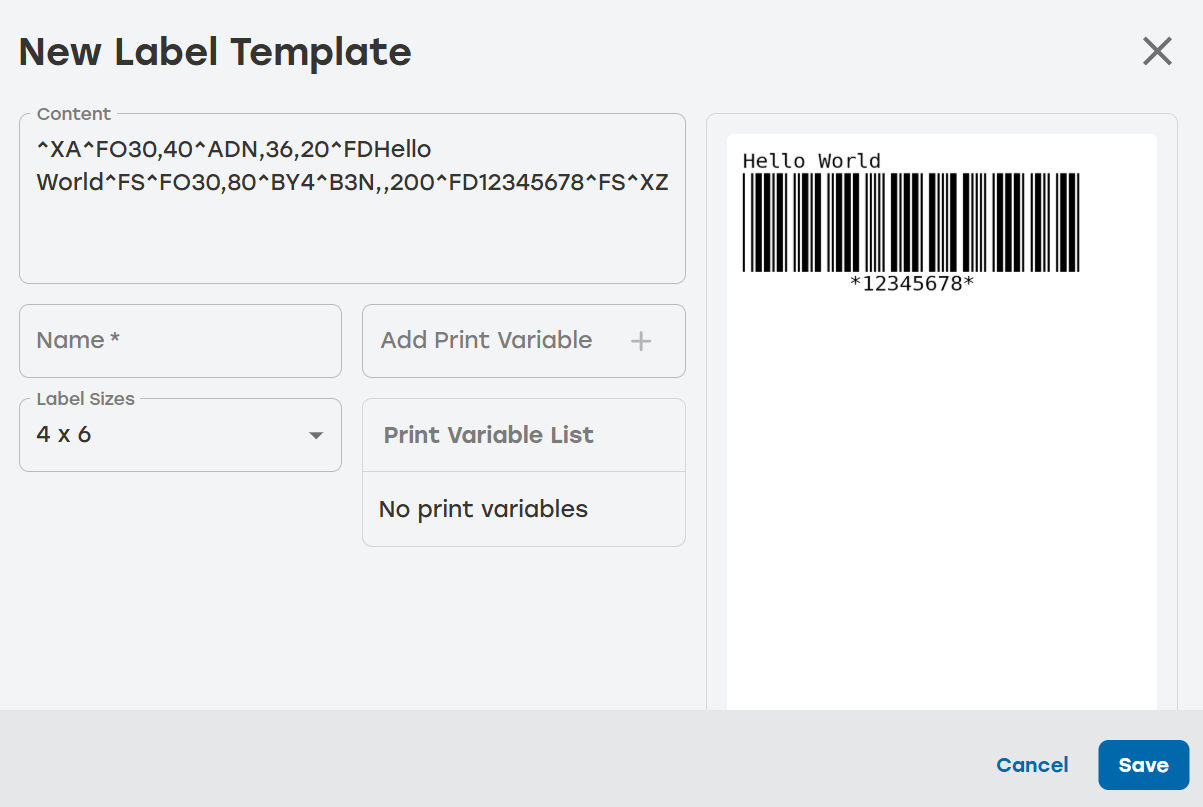
Name: Human readable value that end users can use to identify the label name name in other parts of PackNet.
Label Size: Size of the label to be used.
Content: The ZPL template string, this is sent to the printer and tells the printer how to print the label. The preview will update as the Content field changes.
Print Variables: Inject data into the ZPL string, add the print variable to the ZPL string with the format {variable}.
Select Save.
Make sure the new label now appears on the Label Template screen.
Label Templates History
On the Materials page, select Label Templates.
Select the history icon
 to the right of the desired label template to review the data.
Date: The date and time the entry happened
Type: The type of item listed in the entry
Activity: A brief description of the action
User: The PackNet user who completed the action
Select the arrow icon
 for a detailed view of the activity.
Select anywhere outside the Label History dialog to return to the Materials screen.
Edit Label Templates
On the Materials page, select Label Templates.
Select the edit icon
 to the right of the label template that needs to be edited.
Make changes as needed.
Select Save.
Delete Label Templates
On the Materials page, select Label Templates.
Select the delete icon
 to the right of the label template that needs to be deleted.
A dialog will appear asking to confirm deletion. Select Yes.
Make sure that the deleted label template no longer appears on the Label Templates page.