Import Selection
Import Selection allows users to define headers, select File Import or AMQP Import, and enable Manual Scan to Create or Manual Scan to Trigger.
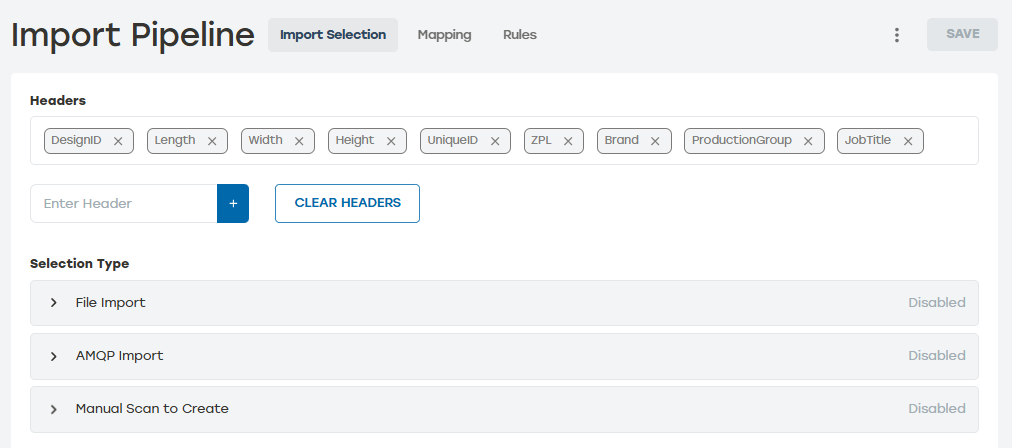 |
Headers
Headers are the fields that will be used to pass data into PackNet. Headers defined in this section can be used to map and transform data in Data Mapping and Rules.
Headers can be defined in two ways. To manually define headers, enter a unique header name into the Enter Header box. If the header field is empty, the headers can be uploaded with a .csv file that contains the headers.
Headers can be deleted by selecting the X next to the header name or selecting Clear Headers to delete all the headers at once.
When using Import Client with a file that does not include headers, the order in which these headers are added matters. When selecting Yes to the question Does your file have headers? a text box will appear above Selection Type. Enter the headers that will be used for the Import Client.
Note
Import Client only runs on machines with Windows 10 or Windows 11.
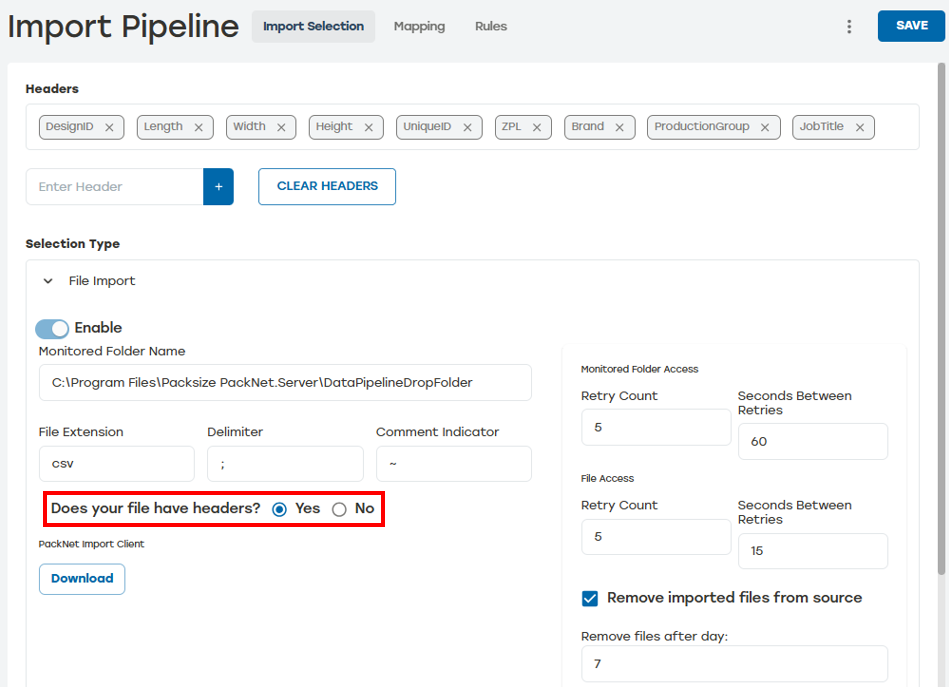 |
File Import
Using File Import allows the Import Client application to watch a folder specified for new files and send the data to PackNet as new jobs. After the file's data is sent to PackNet, it will be renamed according to the following format: [originalfilename].[processed|failed]_[timestamp].
Note
Import Client only runs on machines with Windows 10 or Windows 11.
AMQP Import
Using AMQP Import allows the Import Client application to import jobs by watching for messages published to an AMQP server exchange.
Note
Import Client only runs on machines with Windows 10 or Windows 11.
Manual Scan to Create
Scan to Create allows jobs to be created by scanning a barcode with the defined carton structure.
The Manual Scan to Create section in Import Pipelines is where the user defines the carton that will be created when scanned.
Scan to Create Setup
There are certain settings that must be configured for Scan to Create to work.
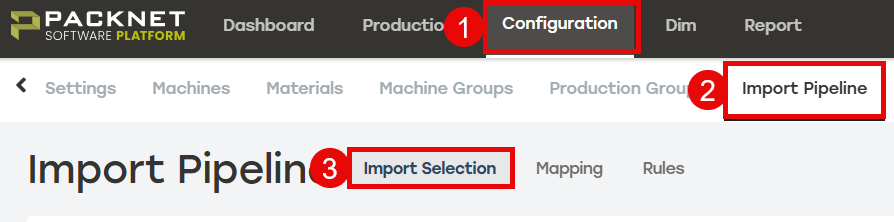
Go to Configuration > Import Pipeline > Import Selection.
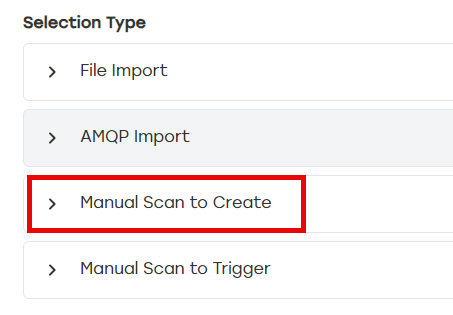
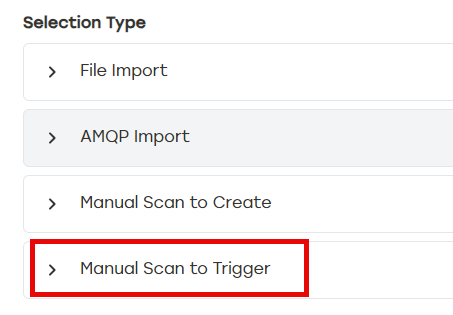
Under Selection Type, select Manual Scan to Create.
Define the barcode structure, and then select Save.
Barcode Order: Defines the headers that will apply to the scanned job. The order the headers will be applied can be changed by using the arrows to the right of each header.
Delimiter: The character to separate each field defined by the included headers.
Character Count: Establishes how many characters will be included on the barcode.
Note
Delimiter and Character Count cannot be used as the same time. When assigning Manual Scan to Create, use either Delimiter or Character Count.
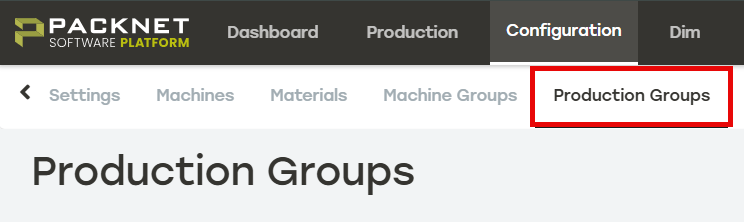
Go to Production Groups.
Create or edit the desired Production Group.
Select Manual scan to produce, and then select Scan to Create.
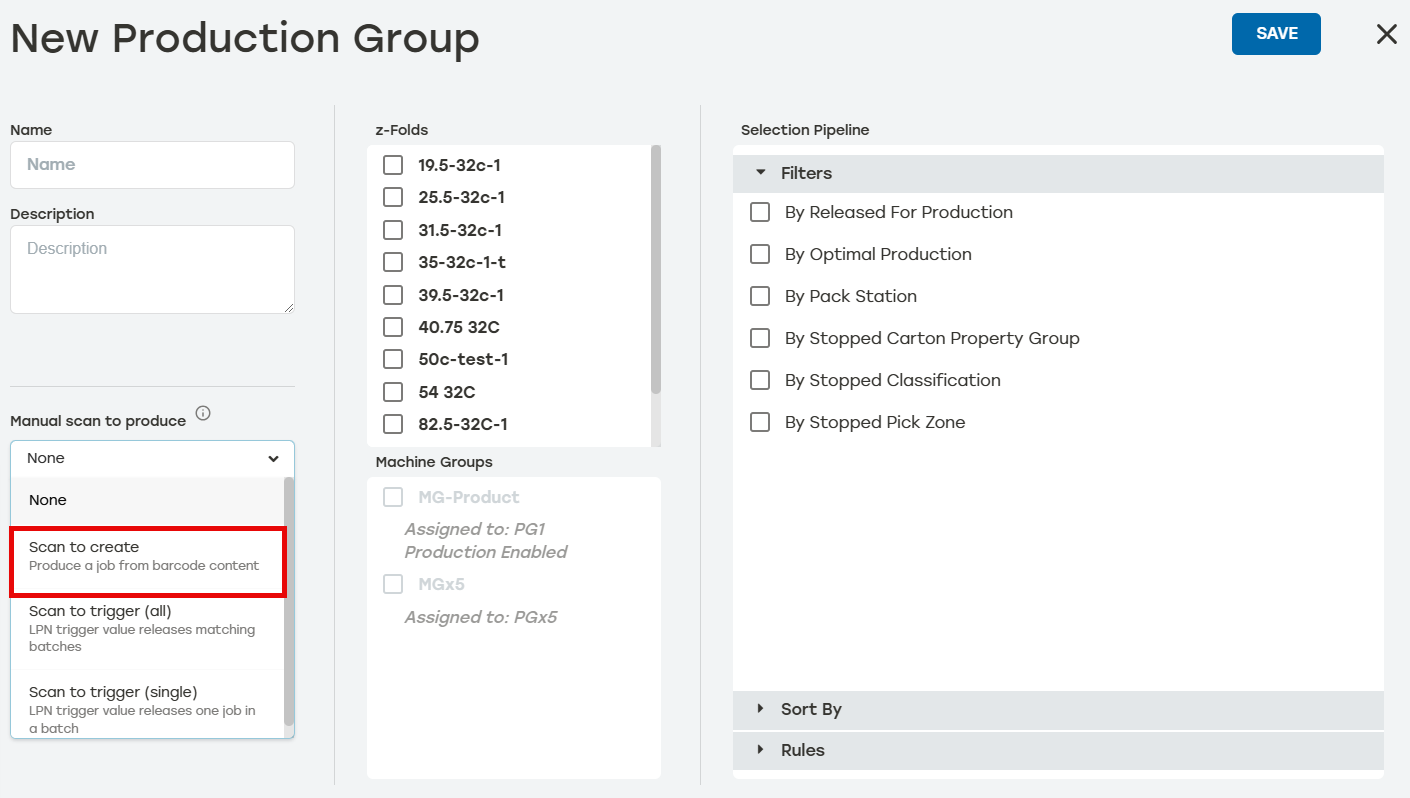
Select Save.
Manual Scan to Trigger
Scan to Trigger holds jobs from being produced until the corresponding License Plate Number (LPN) has been scanned. Once the LPN has been scanned, the job with the corresponding LPN will be released for production and the carton(s) will be created. Production will pause again until the next LPN is scanned.
The Manual Scan to Trigger section in Import Pipelines is where the user enables this feature, but additional set up is required before this feature can be used.
Scan to Trigger Setup
There are certain settings that must be configured for Scan to Trigger to work.
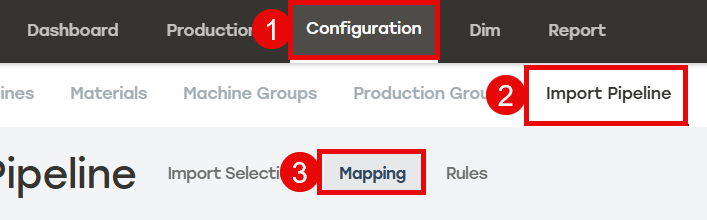
Go to Configuration > Import Pipeline > Mapping.
Make sure orders have a trigger value by mapping any attribute to a LPN.
Go to Rules.
Select Add Rule. Enter Rule Name. Choose the desired configuration for Run this rule, and then select the applicable options from the dropdown menus.
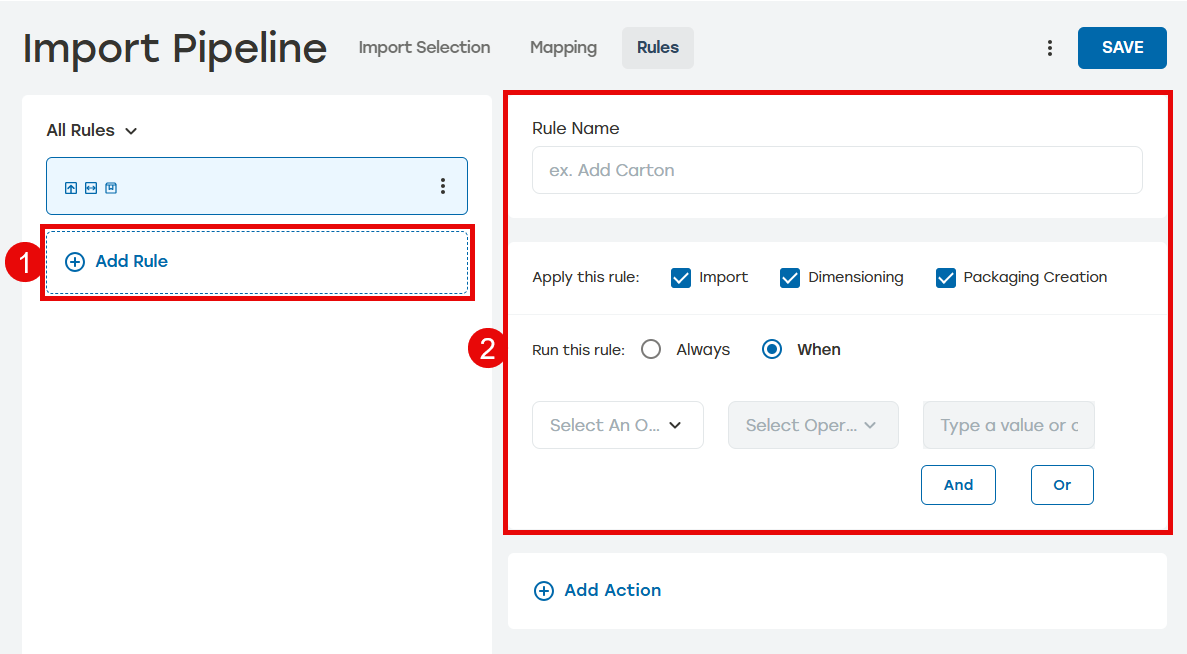
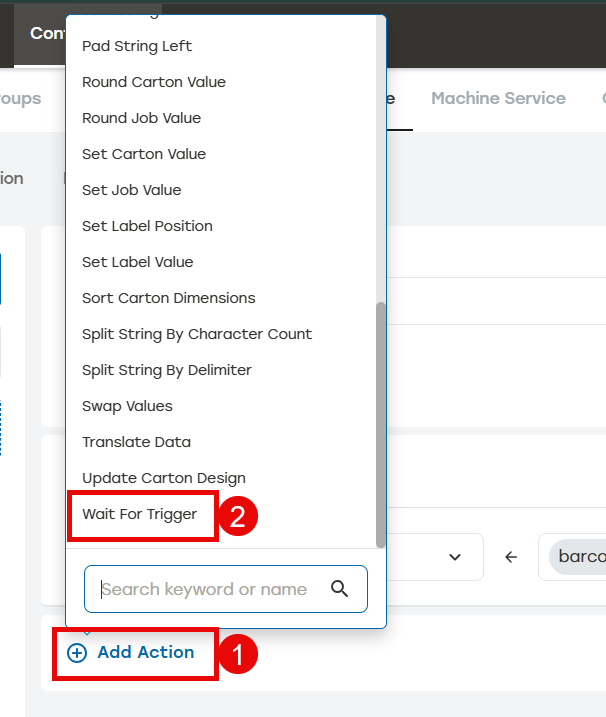
Select Add Action, and then select Wait For Trigger. Select Save.
Go to Import Selection.
Select Manual scan to produce, and then select Scan to Trigger. Select Save.
Go to Production Groups.
Create or edit the desired Production Group.
Select Manual scan to produce, and then select Scan to Trigger (all) or Scan to Trigger (single).

Select Save.
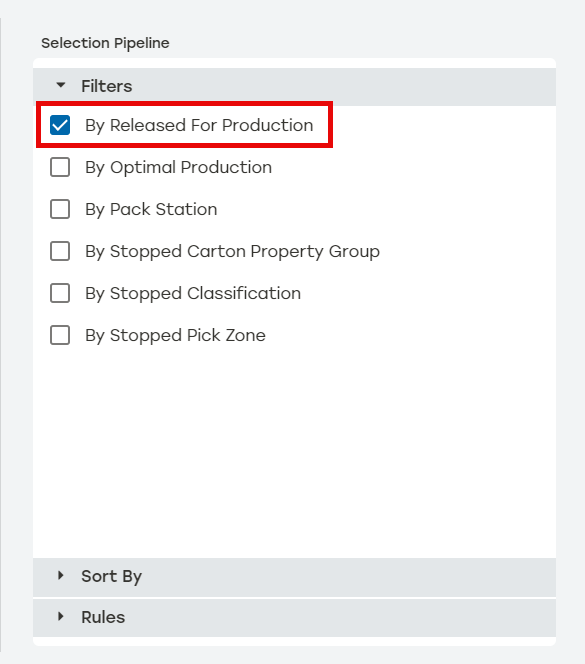
Select Filters, and then select By Released For Production.
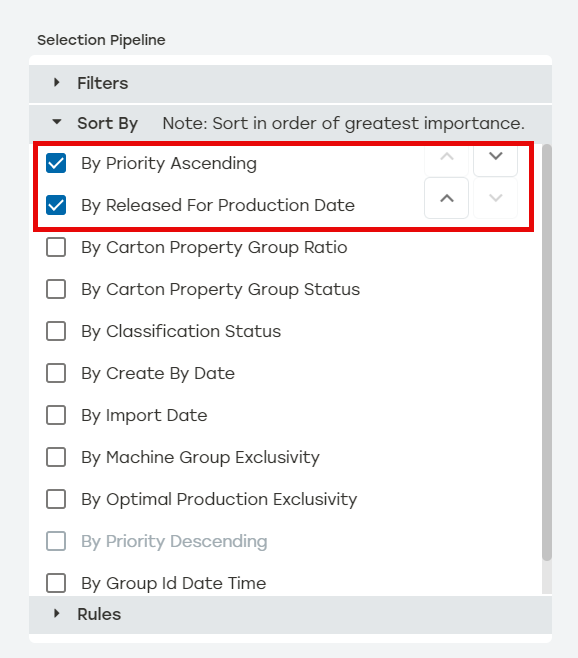
Select Sort By. Select By Priority Ascending first, and then By Released For Production Date.
Note
For Scan to Trigger to provide the best experience the Selection Group Sort By must be By Priority Ascending first and By Released For Production Date second. User can change the order of theses by using the arrows next to the sort by options.
Select Save.