Packaging Creation
The Packaging Creation page is where users find existing packaging solutions and jobs or create new ones. These jobs can be sent directly to a machine or saved for later to be used as templates. Packaging Creation solutions can include both cartons and labels.
Note
Each tenant can only import 10,000 cartons every five minutes.
Carton designs used during Packaging Creation must be added within the Carton Designs page on Materials tab in order to use this functionality (see Carton Designs).
Note
X7 machines do not utilize this feature. All jobs are created directly based on the product size measured at the infeed of the X7 machine.
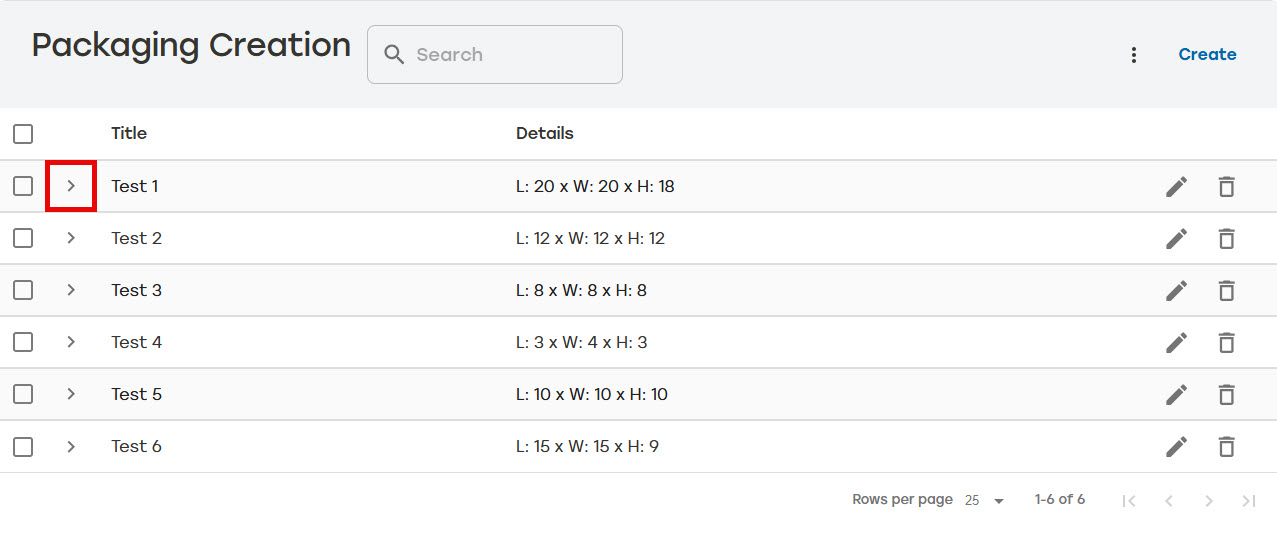
Packaging Creation shows all of the existing packaging solutions that have been created and saved. Users can sort jobs by ascending or descending order by title.
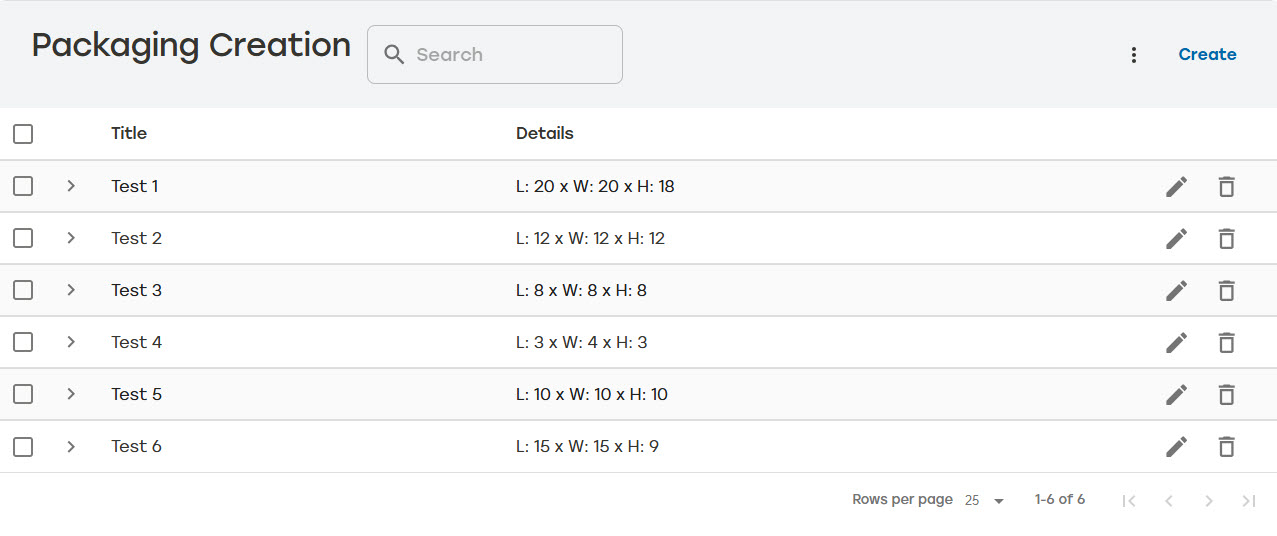 |
Users can search for saved jobs using any of the following:
Job title or name
Box design ID or name
Carton dimensions (LxWxH e.g., 15x9x12)
Carton name
Label template
Label name
Description
Scalable Saved Jobs
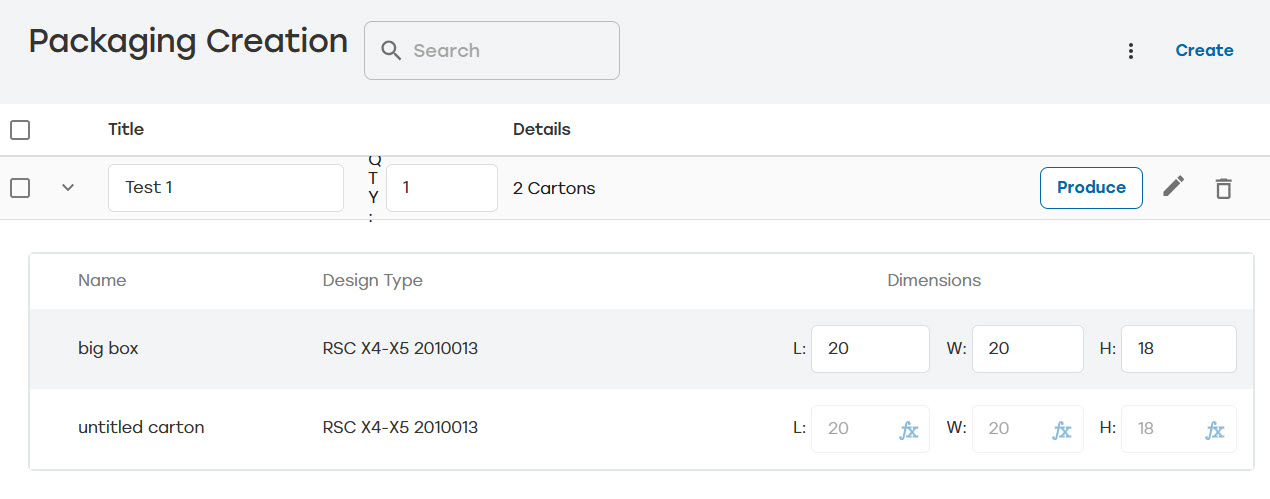
Packaging Creation allows users to create a scalable saved job when the job includes multiple cartons. This is useful when users have complex jobs with multiple cartons that change dimensions based on the size of the primary carton.
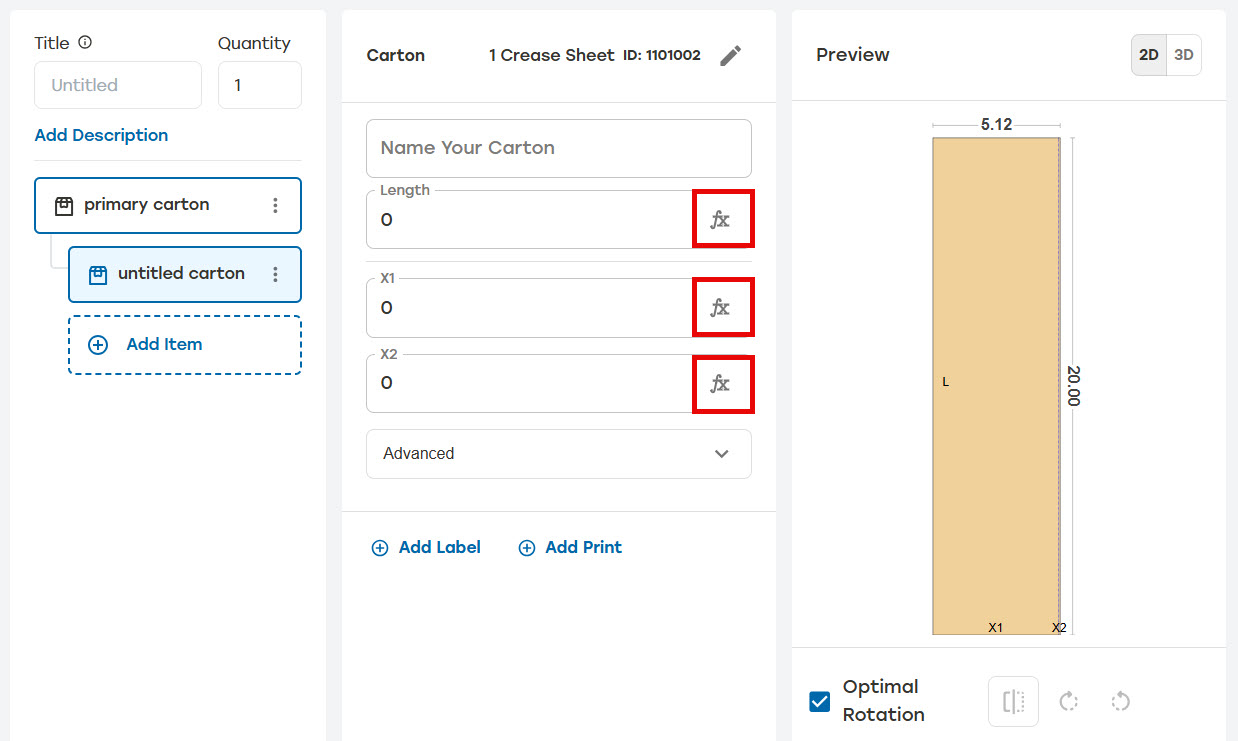
When creating a saved job, users have the ability to enter formulas in place of static dimensions for secondary cartons. PackNet will use those formulas to automatically adjust the dimensions of the secondary cartons based on the dimensions entered for the primary carton.
The dimensions with formulas will have a formula icon in the dimension box to indicate that a formula is being used. The dimensions will also not allow users to manually enter dimensions.
 |
On the Packaging Creation page, select Create.
Name the job in the title box.
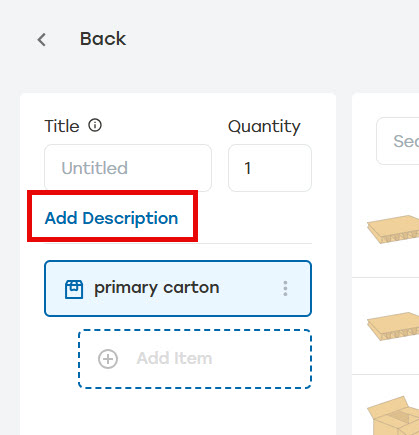
When desired, enter a description for this job. Select Add Description and enter the description in the text box.
When possible, select the menu at the top of the page, and then select Import from History.
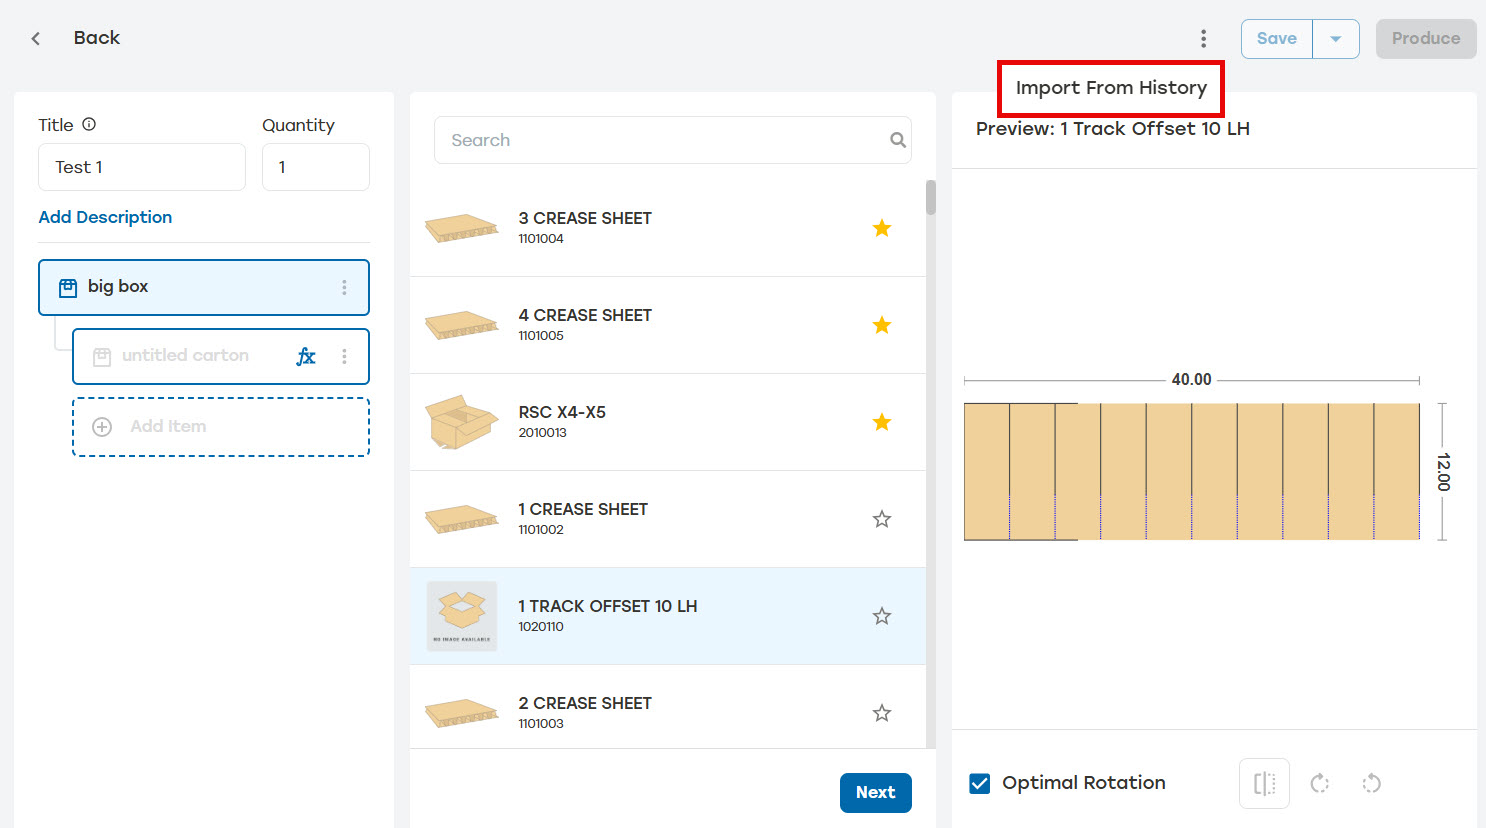
Note
This feature is only available when a saved job is in audit history. When no jobs have been saved in Configuration Audit, a dialog will appear telling the user that no jobs are available for import.
Make sure the information imported is correct.
Select Save to add the new packaging solution to the Packaging Creation list or select Produce to send the job into the job pipeline to be produced.
Enter the quantity to be produced.
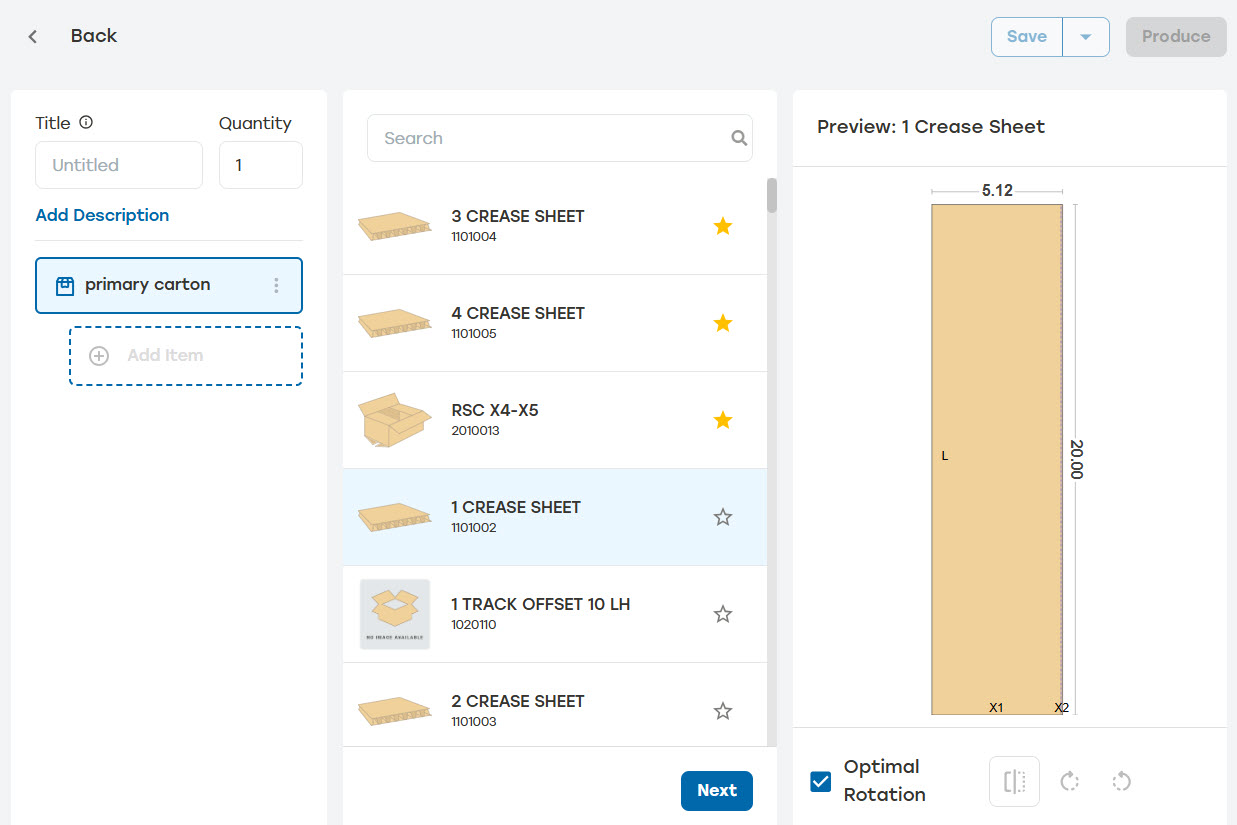
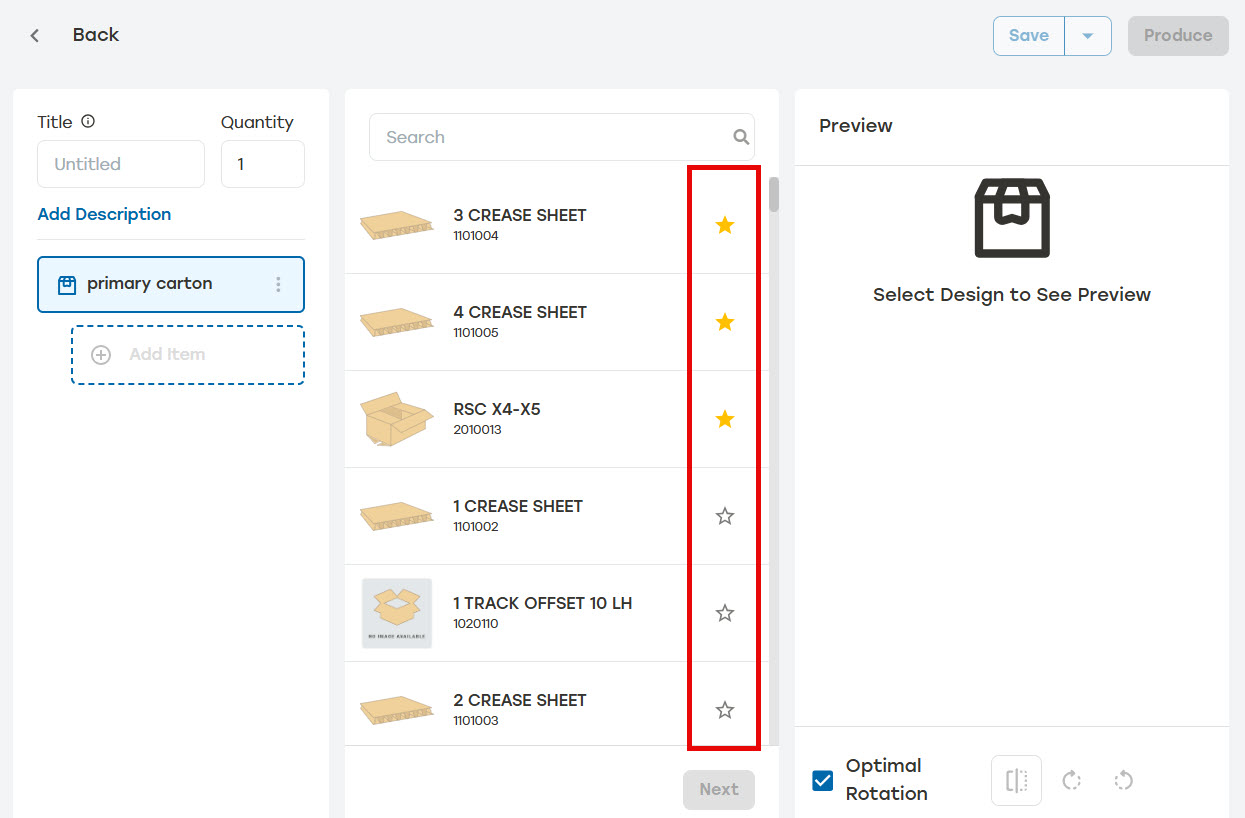
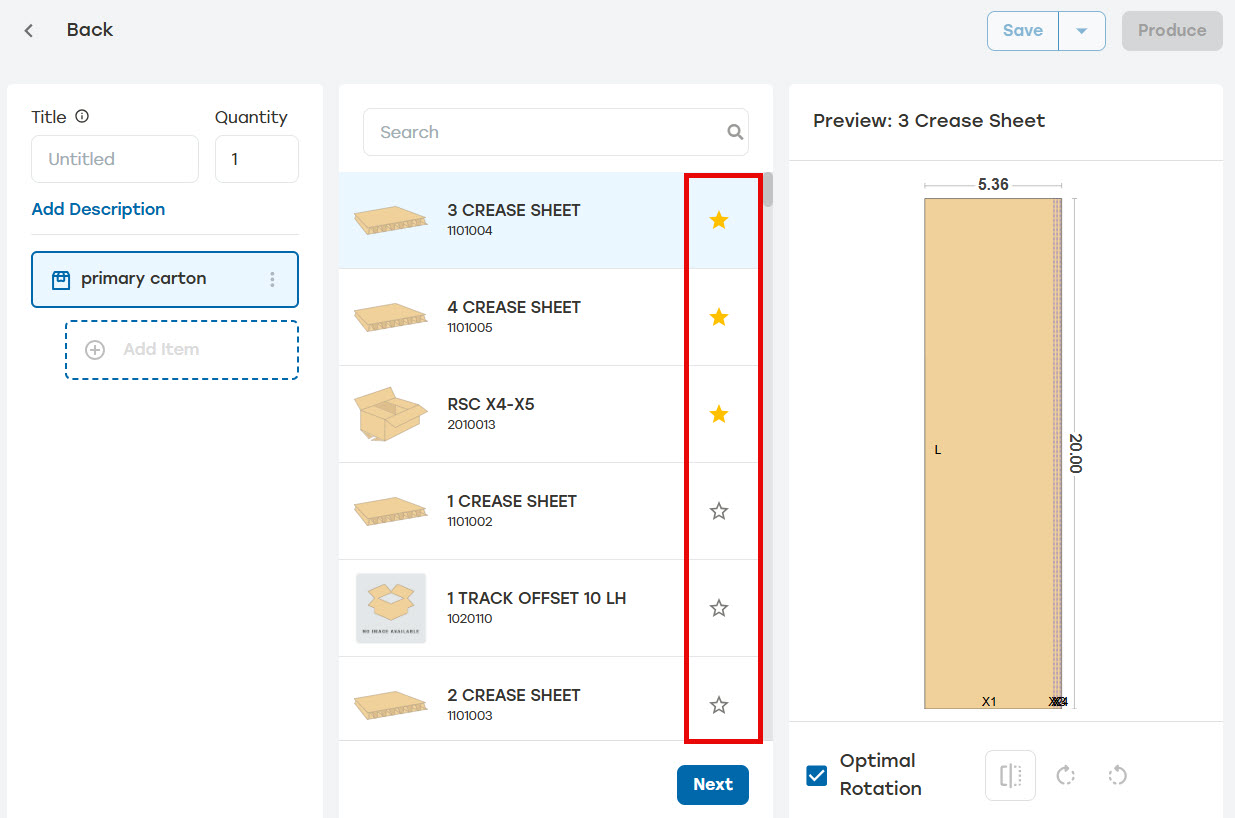
Select a Carton Design, and select Next.
When desired, select the star next to a design to favorite that design. Favoriting designs moves those designs to the top of the carton design list.
When the wrong design is selected, users can change the carton design by selecting the edit icon to the right of the carton name and then selecting another carton design.
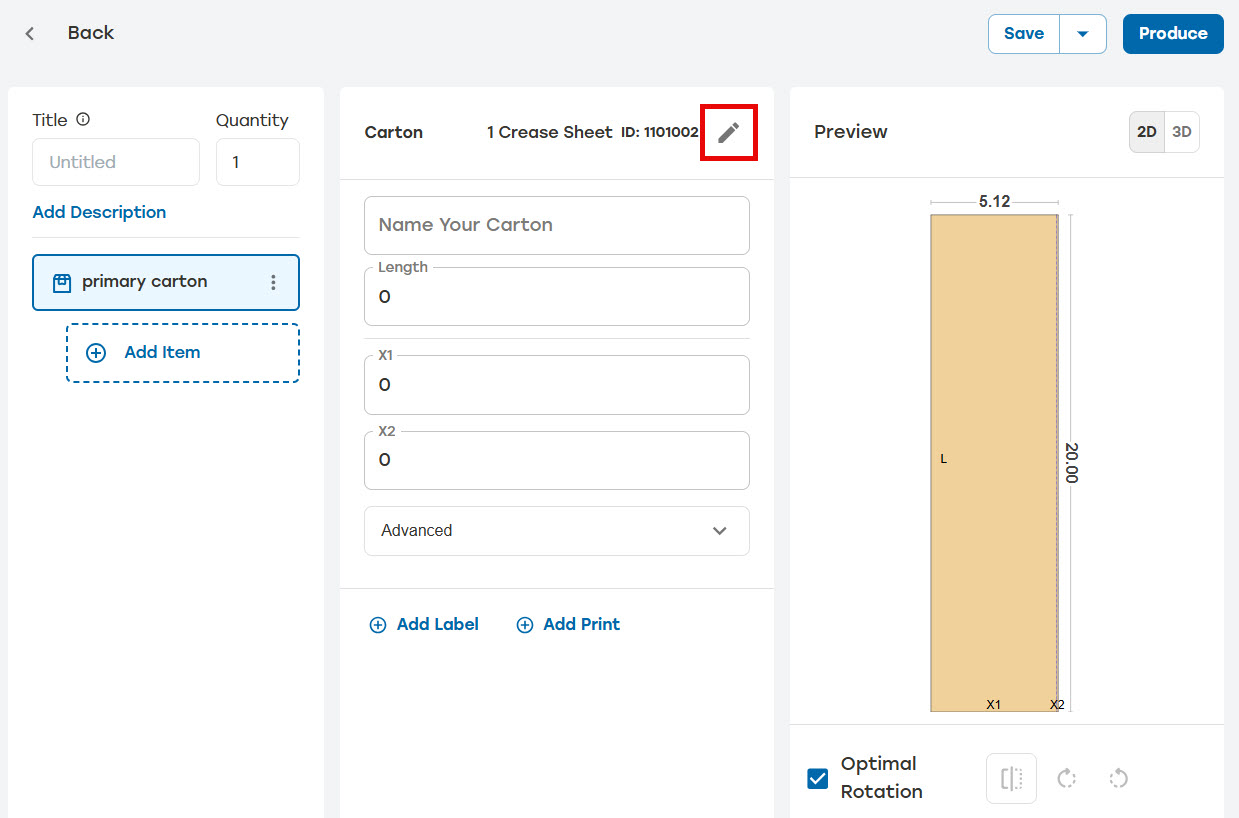
Enter the required information for the selected carton.
When specific Flute and Brand is needed, select Advanced and select the desired Flute and Brand.
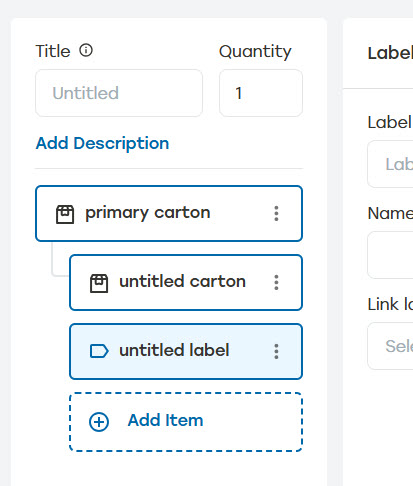
Select Add Item. When adding an item, the user can choose to add either a carton or label.
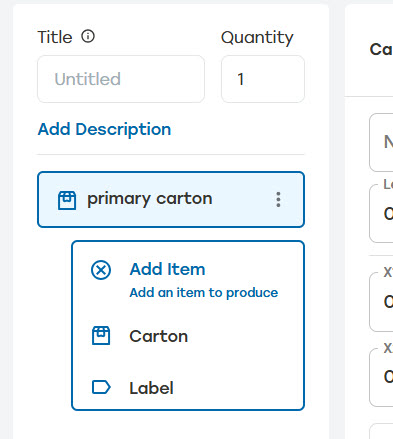
Once a carton or a label is added, the item will be listed in the left hand menu.
When adding an additional carton, users can add formulas to the carton dimensions. These formulas will scale the carton based on the primary carton's dimensions. A formula icon near the carton name will indicate when formulas have been added to a carton.
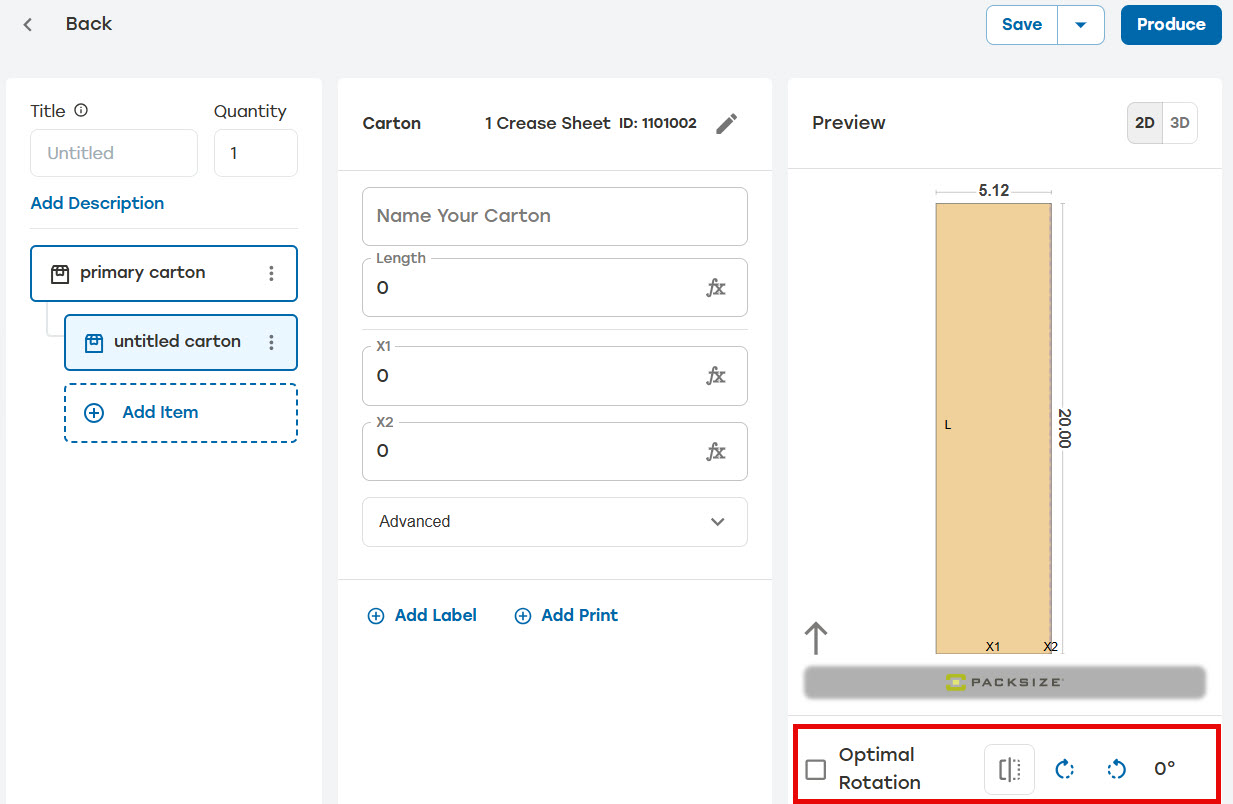
When a specific rotation is needed, uncheck Optimal Rotation and use the buttons at the bottom of the 2D preview to enter the desired rotation.
Once the carton information has been added, select Save to add the new packaging solution to the Packaging Creation list or select Produce to send the job into the job pipeline to be produced.
Note
Selecting Produce does not save the job to the Packaging Creation list.
Create or edit a job.
Select a carton design then select Next. When desired, select the star next to the carton to favorite it.
Enter the dimensions for the current carton as the fields permit.
When specific Flute and Brand is needed, select Advanced and select the desired Flute and Brand.
When a specific rotation is needed, uncheck Optimal Rotation and use the buttons at the bottom of the 2D preview to enter the desired rotation.
Once the carton information has been added, select Save to add the new packaging solution to the Packaging Creation list or select Produce to send the job into the job pipeline to be produced.
Carton Options
Once a carton has been created, several options become available in the carton menu.
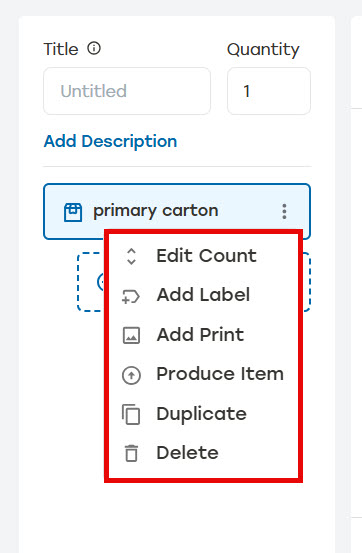 |
Edit Count: Edits the number of the selected carton to be produced
Add Label: A new label is created already linked to the carton
Add Print: When enabled, the selected image will print on the carton
Produce Item: Only the selected carton will produce immediately
Duplicate: The selected carton will be duplicated with "copy" added to the duplicate title
Delete: Instantly removes the carton and any items linked to it
Note
Not every machine comes equipped with a printer. Users may need to add a printer before they'll have the ability to print.
Create or edit a job.
Create a label by doing one of the following:
Select Add Item in the left menu.
Select Add Label at the bottom of the carton details
Select the menu on the right of a carton in this job, and then select Add Label.
Select the desired label. The label design page will appear.
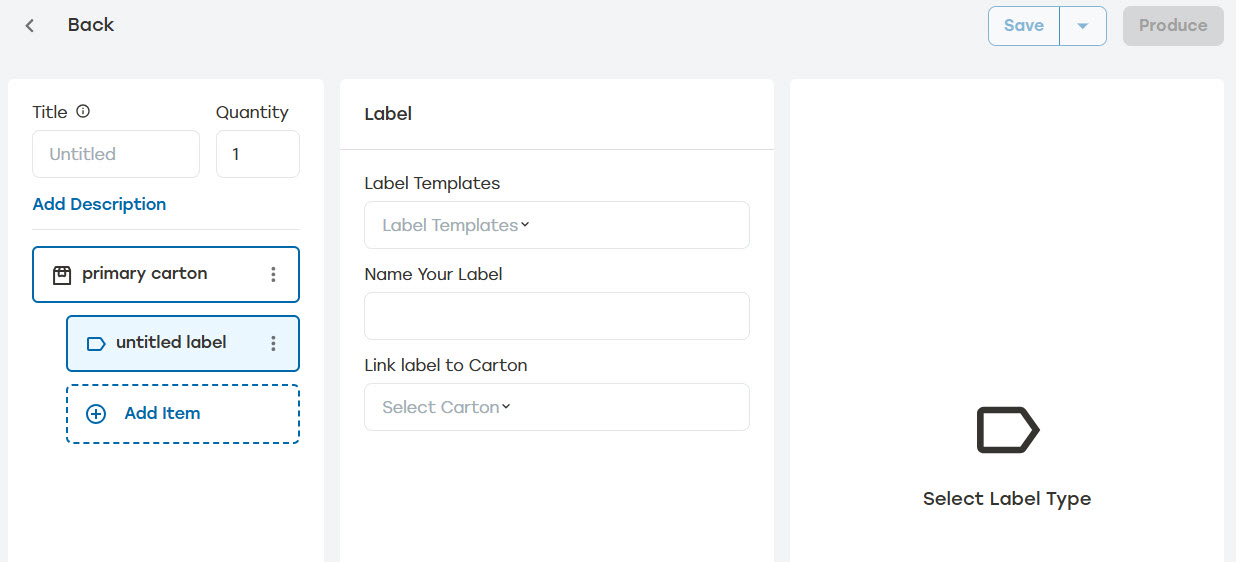
Select Label Templates. A preview of the label template will appear.
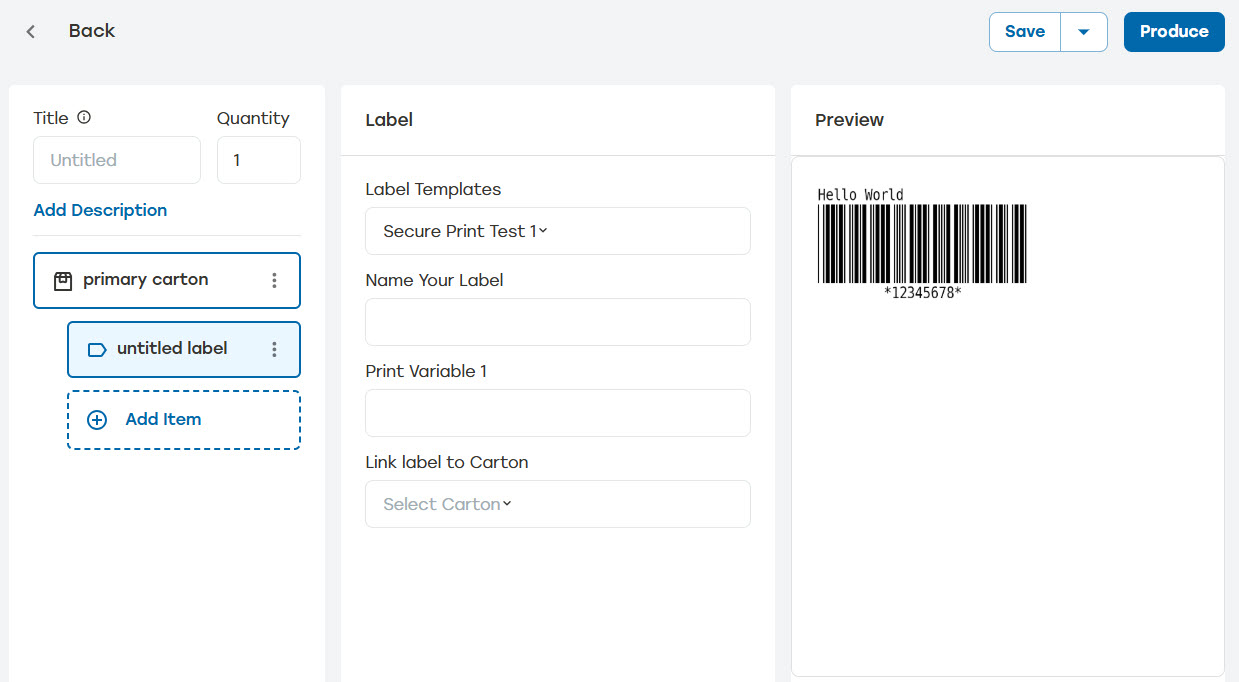
Enter a label name.
Add additional information as the label template permits.
When desired, a label can be linked to a specific carton by creating the label from that carton's menu or selecting the carton's name on Link label to Carton dropdown. Links can also be removed when the link is no longer desired.
Select Save to add the new packaging solution to the Packaging Creation list or select Produce to send the job into the job pipeline to be produced.
Label Options
Once a label has been created, several options become available in the label menu.
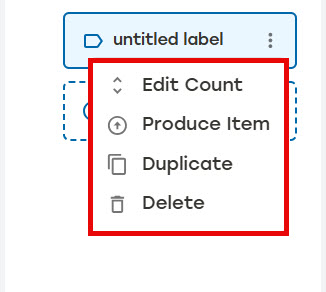 |
Edit Count: Edits the number of the selected label to be produced
Produce Item: Only the selected label will produce immediately
Duplicate: The selected label will be duplicated with "copy" added to the duplicate's title
Delete: Instantly removes the label
Saved jobs can be sent to production from the Packaging Creation list.
Select the dropdown arrow of the desired job.
When needed, make edits to the job. These edits will only apply to this job and will not be saved.
Select Produce.
Go to the Packaging Creation page.
Select the edit icon
 to the right of the job that needs to be edited.
Make changes as needed.
Select Save to overwrite the old job or select Produce to send the job into the job pipeline to be produced.
Note
Selecting Produce does not save the job to the Packaging Creation list.
Go to the Packaging Creation page.
Select the edit icon
to the right of the job that needs to be edited.Make changes as needed.
Select the dropdown to the right of save.
Select Save as New.
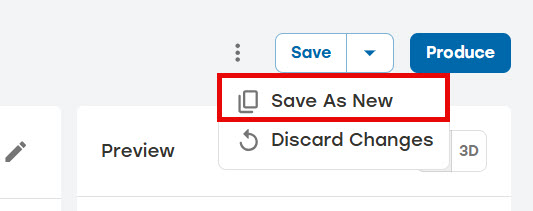
Enter a new job title.
Select Save As New.
Jobs can be deleted individually or in bulk.
Delete a Single Job
Go to the Packaging Creation page.
Select the delete icon
 to the right of the job that needs to be deleted.
A dialog will appear asking to confirm deletion. Select Delete.
Make sure that the deleted job is no longer shown on the main Packaging Creation page.
Delete Multiple Jobs
Go to the Packaging Creation page.
Select the boxes to the left of the jobs that need to be deleted or select the box at the top of the list to select all.
Select Delete Selected Jobs.
A dialog will appear asking to confirm deletion. Select Delete.
Make sure that the deleted jobs are no longer shown on the main Packaging Creation page.
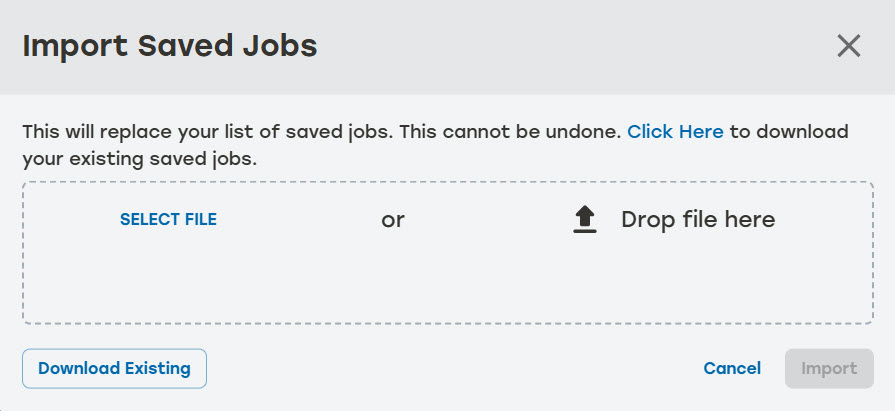
Users can create multiple saved jobs at once by importing a file containing the list of job configurations to be added to PackNet. Importing saved jobs will replace all existing jobs unless the Keep existing saved jobs checkbox is selected. Selecting this checkbox will add any new jobs to the list of existing jobs in PackNet.
Go to the Packaging Creation page.
Select the menu at the top of the page, and then select Import.
When desired, select Download Existing to download the current list of saved jobs.
Select the file containing the saved job configurations by doing one of the following:
Select Select File, navigate to the file, and then select Open.
Drag the file to the Import Saved Jobs dialog.
When desired, select the Keep existing saved jobs checkbox. The import will replace all existing saved jobs unless this checkbox is selected.
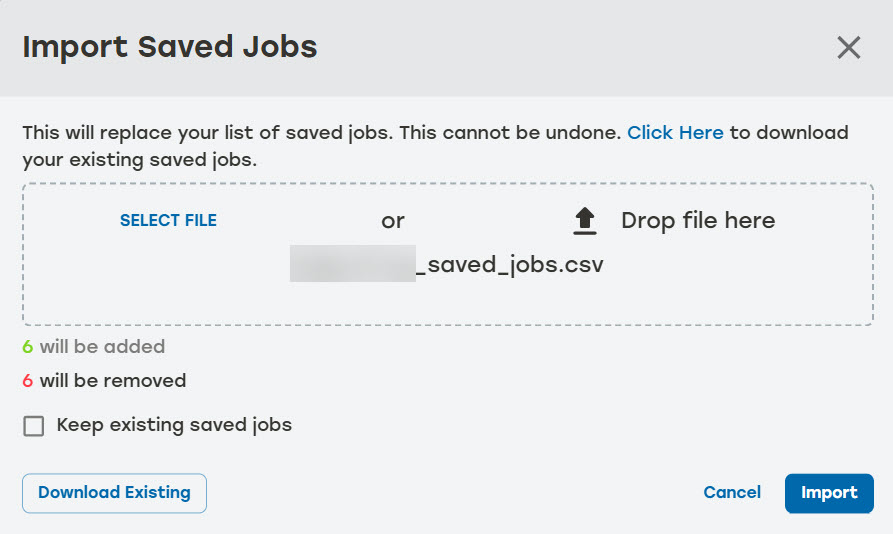
Select Import.
Users can export a CSV of all the jobs currently saved in PackNet.
Go to the Packaging Creation page.
Select the menu at the top of the page, and then select Download.
A CSV file containing the current saved job details will be downloaded.
Users can restore jobs that have been deleted from PackNet. Jobs are available for restoration for three days after deletion.
Go to the Packaging Creation page.
Select the menu at the top of the page, and then select Restore Saved Jobs.
Select the jobs to restore.
Select Restore.