Orders
The Orders page shows machine status, production status, and production history. From the Orders page, users have greater control over upcoming jobs with the ability to cancel production, send jobs to produce next or produce now, scan to create, and scan to trigger.
This section describes all the options available from the Orders page, but access to some features may be restricted based on company subscription or user permissions.
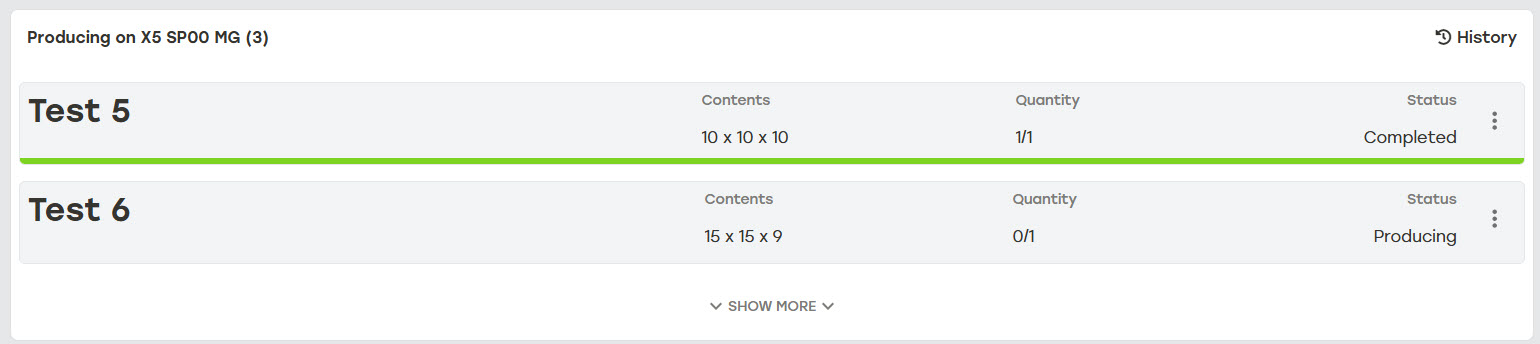
The status box at the top of the page displays the status for the selected machine group or a progress bar showing the status of jobs actively being produced.
 |
 |
 |
For multiple quantity jobs, the progress bar shows progress of the entire job and not the individual cartons within it.
 |
By default, up to two jobs can be visible at one time. When there are more jobs available, this section can be expanded to show additional jobs.
 |
Available Orders
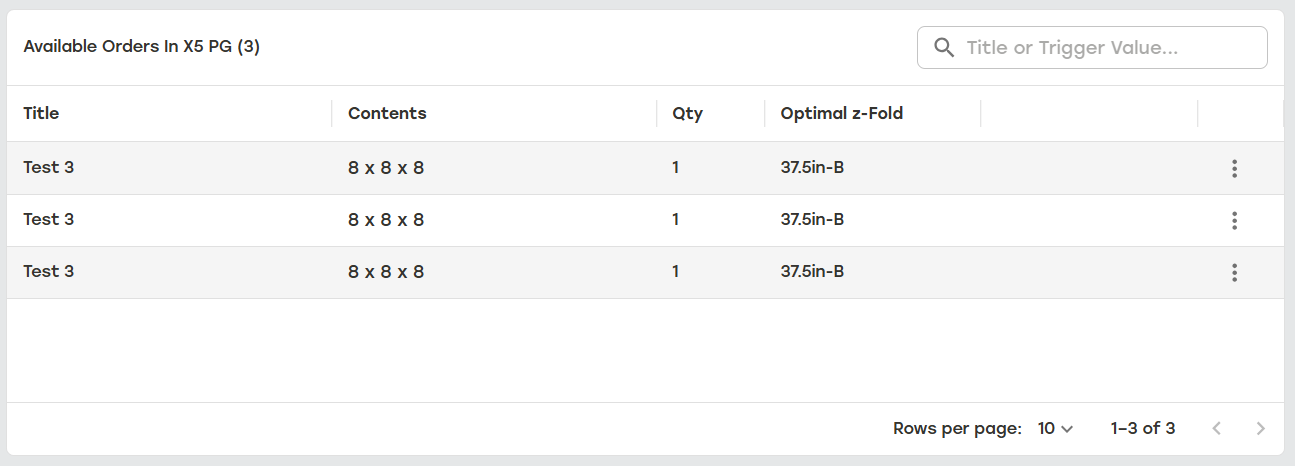
The Available Orders In [Production Group] table shows all of the available jobs for the selected production group. For jobs with more than one quantity, the entire job will appear on one line with the number of cartons indicated in the Qty column. The Optimal z-Fold column displays the optimal z-Fold of the production group for completing the job. When more than one z-Fold type is considered optimal, only the first z-Fold will be listed.
 |
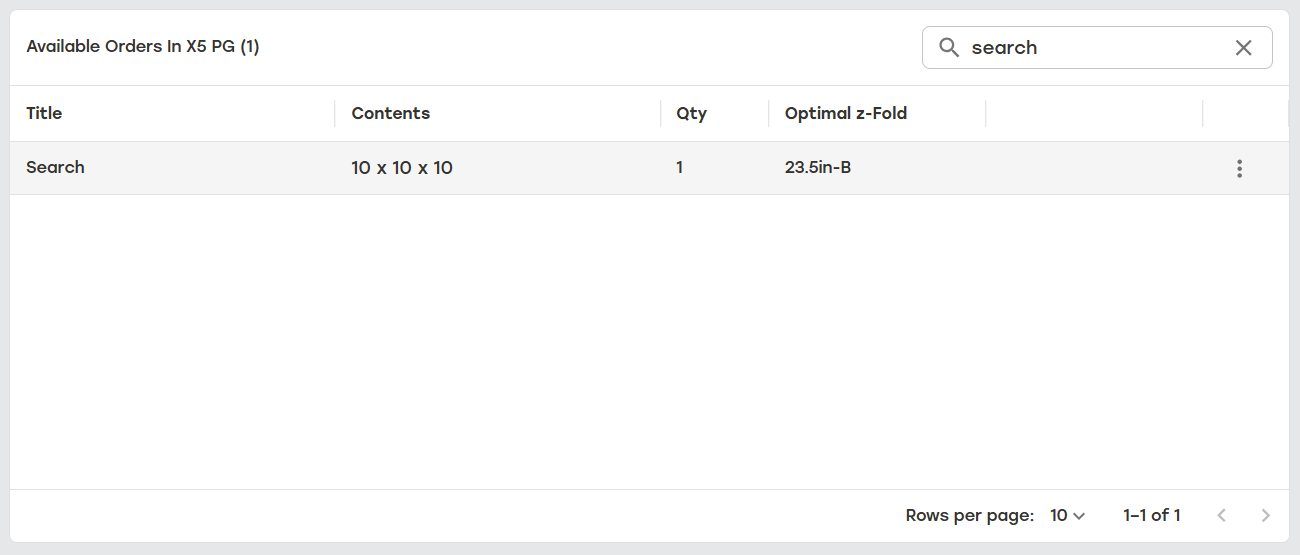
Available orders are searchable by title or trigger value. Once the desired search term is entered, selecting enter or the search icon will initiate the search. To remove the search, select the X in the search bar.
 |
The jobs in this section will be ordered based on the settings established in the production group configured settings. The settings that impact the order the jobs show in Available Orders are:
By Create By Date
By Import Date
By Priority Ascending
By Priority Descending
By Released for Production Date
Note
Depending on how Selection Pipeline is configured, jobs may be produced in a different order than they are displayed.
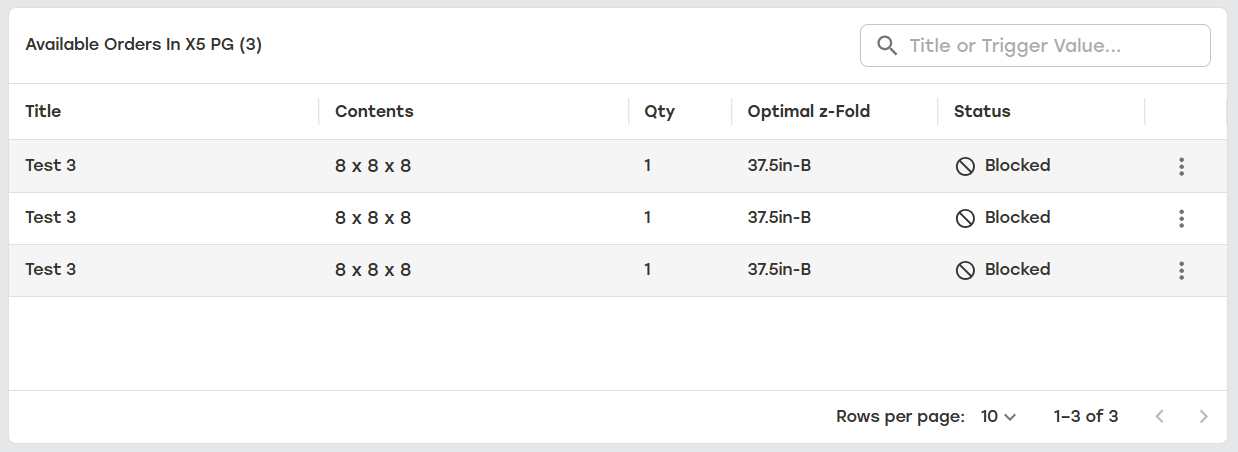
When jobs are in a Staged status but unable to produce for some reason, a Blocked indicator will be appear to the right of the job information. Hovering over the Blocked indicator will provide a high level explanation for why the job is unable to produce.
 |
Reasons for why a job may be unable to produce include:
Distribution of work across machine groups is not enabled
{title} is already producing
{title} was not found
Cannot be produced on machine group
Required z-Fold not loaded
{title} cannot be produced optimally in production group
Packstation is not assigned for {title}
Carton Property Group is stopped
Classification is stopped
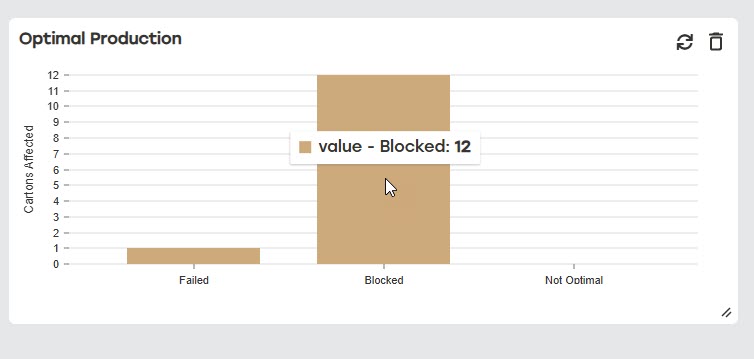
Users can find more information on how to unblock a job by going to the Optimal Production widget on the dashboard and selecting the Blocked jobs.
 |
Note
Because Blocked is an indicator and not a status, the reason for the job being blocked will not reflect in Search or audit logs. This is because the status for these jobs has not changed and is still Staged.
Orders History
The History page shows the most recent 100 jobs produced within the last seven days. Jobs can be reproduced from this page.
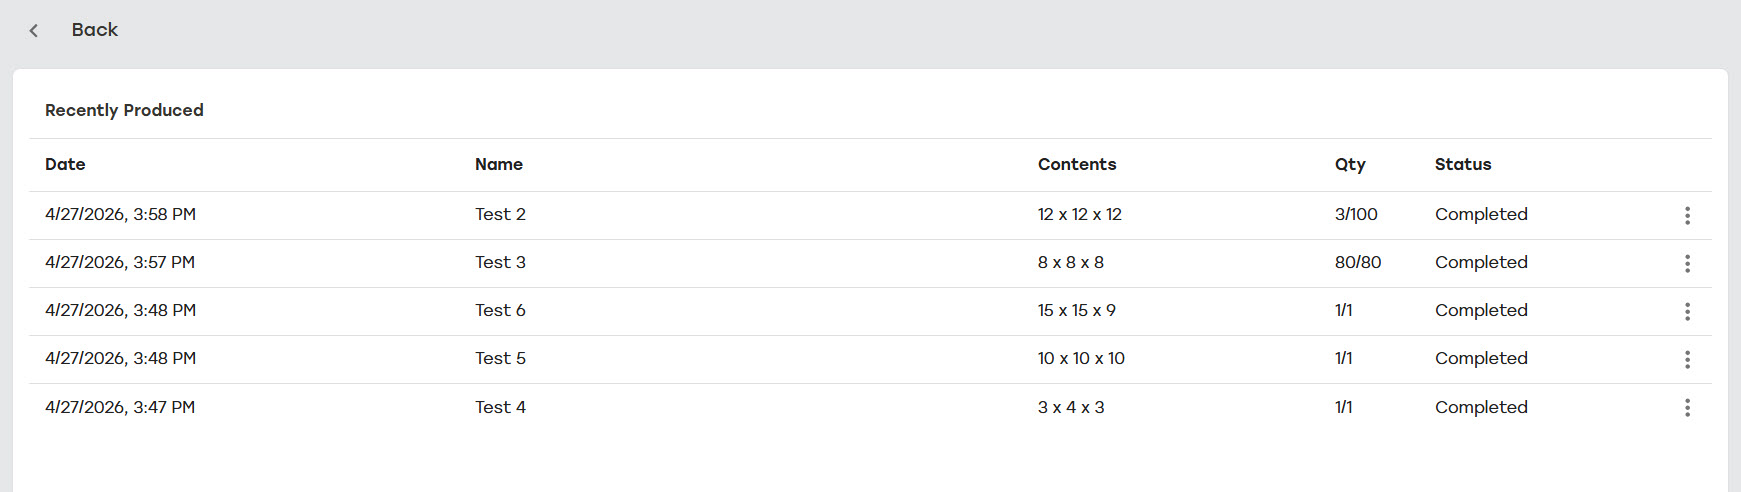 |
On the Orders page, select History.
Select the menu to the right of the job to be reproduced.
Select Reproduce (single quantity). This will only produce one carton even for multiple carton jobs.
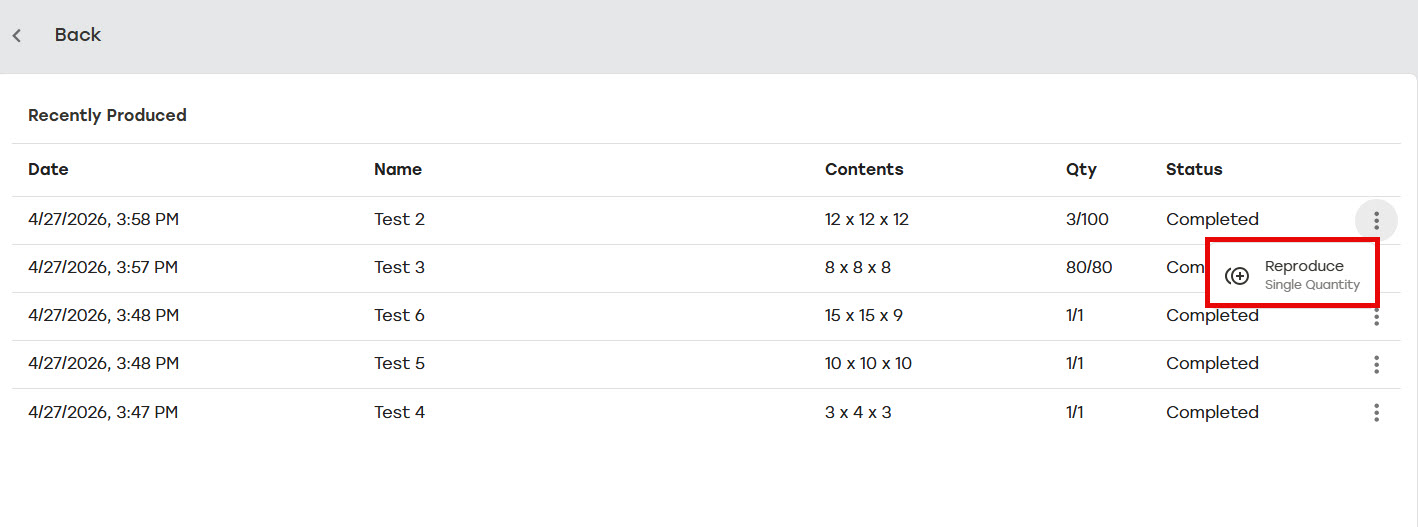
The job will move to the top of the production group queue.
Select Back to Orders to return to the Orders page.
Cancel Production
Cancel Production stops production of a job that is currently producing or prevents production on a staged job and removes it from the Available Orders In section. When a multiple quantity job is canceled, all the remaining cartons in that job will be canceled without the customer needing to cancel each carton individually.
Select the menu to the right of the job that needs to be canceled. This can be done from both the Producing and Available Orders In sections.
Select Cancel Production.
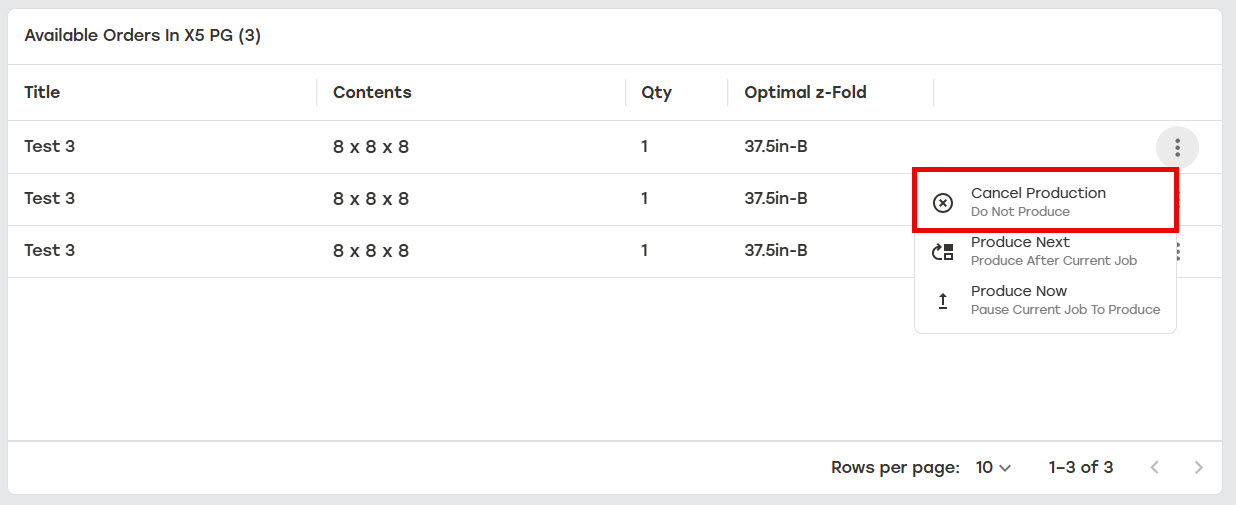
The job will stop producing or be removed from the production group queue and not be produced.
Produce Next
Produce Next will move the job to the top of the production group queue with a Producing Next status.
Select the menu to the right of the job that needs to be produced next.
Select Produce Next.
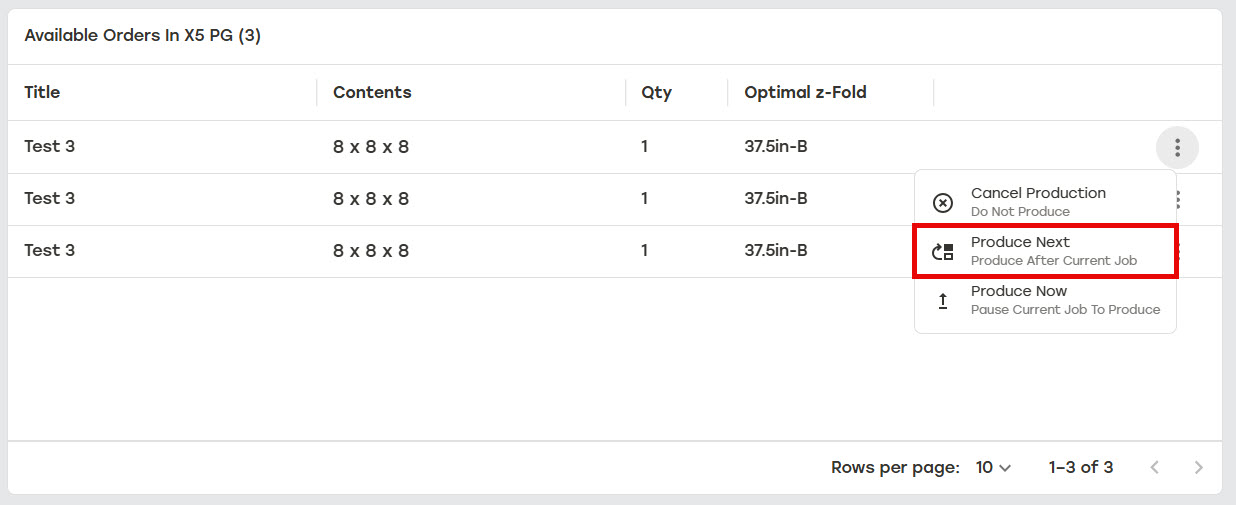
The job will move to the top of the production group queue with the status Producing Next.
Produce Now
Produce Now starts production on the selected job immediately. When there is another job currently in progress, that job will pause and wait with a paused status. Once the Produce Now job is finished, the paused job will resume.
Select the menu to the right of the job that needs to be produced.
Select Produce Now. Any currently producing jobs will pause and the selected job will begin production.
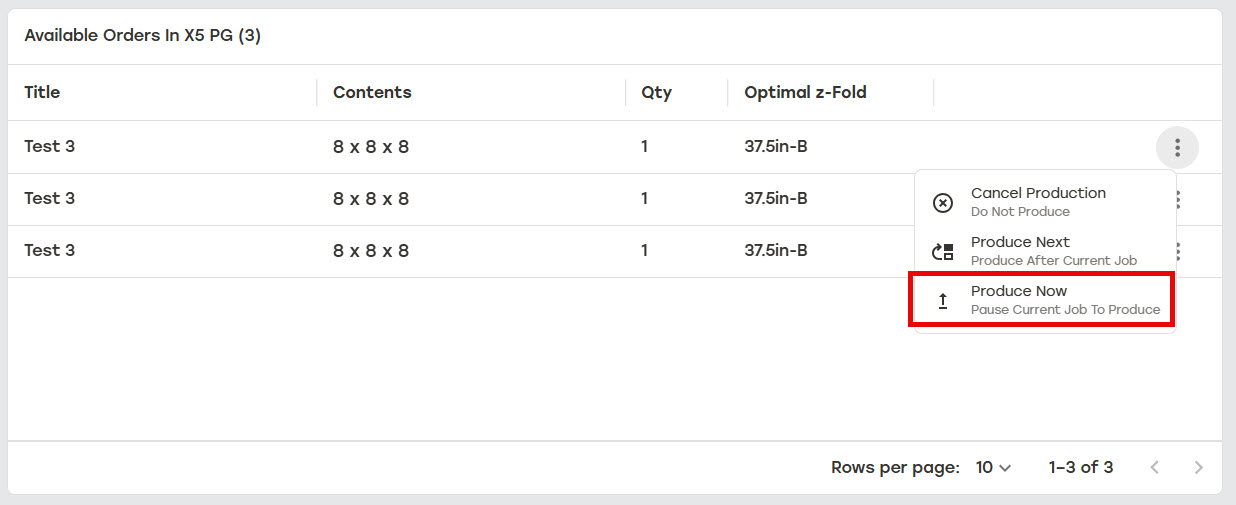
Once the Produce Now job is finished, the paused job will resume.
Scan to Create
Scan to Create allows jobs to be created by scanning a barcode with the defined carton structure.
Note
There are two settings that must be configured for this feature to work.
Barcode structures must be defined in Import Pipelines. See PackNet Integration Requirements for more information.
The Production Group must have Scan to Create selected. See Production Groups for more information.
Select the Ready to Scan box.
Scan the desired barcode.
The scanned job will begin producing.
Scan to Trigger
Scan to Trigger holds jobs from being produced until the corresponding License Plate Number (LPN) has been scanned. Once the LPN has been scanned, the job with the corresponding LPN will be released for production and the carton(s) will be created. Production will pause again until the next LPN is scanned.
Note
There are three settings that must be configured for this feature to work.
Orders must have a trigger value. Trigger values are set by mapping a License Plate Number to any attribute in Import Pipeline. See PackNet Integration Requirements for more information.
Create a Wait for Trigger rule in Import Pipeline. See PackNet Integration Requirements [SPEC-00037] for more information.
The Production Group Configuration needs the following settings. See Production Groups for more information.
Manual scan to produce must to be set to Scan to Trigger (Single) or Scan to Trigger (All).
On the Filter dropdown, select Released by Production.
On the Sort by dropdown, select 1. By Priority Ascending and 2. By Released for Production Date in that order.
Select the Ready to Scan box.
Scan the desired LPN.
All jobs with that LPN will start producing.